Be Joyful

Rejoice in the Lord always. Again I will say, rejoice! Let your gentleness be known to all men. The Lord is at hand. Be anxious for nothing, but in EVERYTHING by prayer and supplication, with thanksgiving, let your requests be made known to God; and the PEACE OF GOD, which surpasses all understanding, will guard your hearts and minds through Christ Jesus. Philippians 4:4-7

These are verses I memorized years ago and they are written on my heart. There are times when I still need to remember not to be anxious, but I eventually listen to my heart saying these verses. I didn't really understand what the "peace of God" was until I experienced it. It's having peace inside you, even when you're going through heartbreaking situations and trials. It does "surpass ALL understanding" and you know it comes from GOD alone. Praise the Lord for His wonderful promises!


I love, love, love what I do. I am passionate about the things I create and the talents God has placed in me. I SO appreciate the time you take to look at my things and the comments you all leave me!

Blessings to you!

Kathy

Tuesday, April 30, 2013

ODBDSLC152 - Needle It


This is my second post of the day!  If you are looking for the CottageCutz Blog Hop, please see the post below or click here!


Happy Tuesday everyone!

It's time for a new Shining the Light Challenge at Our Daily Bread Designs!

This week's challenge is:
Needle it!! Use piercing or real stitching on your creation.

To make the challenge even more fun, we will be giving out a prize, a $15 gift certificate to be used toward stamps at the Our Daily Bread Designs store!! Entries for the prize must be submitted by Sunday, May 5 at 8 p.m. EST. One random winner will be chosen and announced next Saturday.

While it is not required to use Our Daily Bread Designs images and sentiments on your creations, we would love to see them if you have them. As a way of recognizing those who do use Our Daily Bread Designs stamps, we will again be choosing three or more of our participants for the Shining the Light Award . In order to qualify for this award or join the challenge, however, you must use Our Daily Bread stamps and have your submission added to Mr. Linky by Sunday, May 5 at 8 p.m. EST. If you upload your creations to Splitcoast Stampers or any other online gallery, please use the keyword is ODBDSLC152. When creating your posts on blogs please include a link to the challenge.

 
Here is my card for the challenge this week!


Click on photo for a better view!
 
 
I chose to do piercing (on the black mat) because I'm not too fond of sewing!  The one time I tried machine sewing on paper it came out terrible!  I used the beautiful Romantic Floral Designs Stamps for the flourished frames on the layers, matching the Labels 26 Dies.  The sentiment is from the Flourished Verses Set which I think goes nicely with the frames.  The thing I love about these frames is they're clear stamps so it's easy to stamp them around sentiments.  Here are the sets I used.


Card recipe:
 
Paper: Black, peach, The Mariposa Stack (DCWV)
Ink: Onyx Black (VersaFine)
Accessories: Piercer, Labels 26 (Spellbinders), adhesive pearls (Want-2-Scrap and Recollections), Black Seam Binding (Really Reasonable Ribbon), flower punch (EKSucess), jewelery findings/stick pin, Bow-Easy
 
For more inspiration, please visit my design team sisters to see their beautiful creations this week. You can also see all the creations together on the ODBD Blog!


Gloria Stengel - Guest Designer


Thanks for stopping by today!

Blessings!

Kathy

CottageCutz Blog Hop


Hi everyone!

Welcome to the CottageCutz Blog Hop for April!  We have lots of gorgeous creations to share with you today using the Beautiful CottageCutz Dies, so grab your favorite drink and enjoy the hop!!


You should have arrived here from the CottageCutz Blog, if not please start there so you don't get lost on the way and miss anything!


For my creation today, I made a tag booklet with a matching pocket to hold it in.  I used the Large Confectionery Bag to create the pocket using double-sided Cherish Designer Paper by Authentique.  I then used matching designer papers to cut a bird and a birdcage (Birdcage & Stand Die), and some leaves and roses (Heart Rose Wreath Die) to decorate the front. 
 
The booklet was created by using the Fancy Insert Card/Tag using the designer papers for the front and back and cream paper for the inside of the booklet.   I used a Crop-a-Dial to make holes and added some fibers to hold it together.  I then decorated the booklet with the Mini Dress Form Die and added a bow.
 
Here's the back...


The other products I used: Victorian Velvet and Antique Linen Distress Inks, White Twine (May Arts), Bow-Easy, fibers, and Scor-tape.
 
Thank you for joining the hop today!  Your next stop on the hop is the super talented Olena!  Be sure to leave comments on all the designers' blogs and The CottageCutz Blog to be entered to win!  There will be 3 randomly picked winners!!!
 
Blessings!
 
Kathy

Wednesday, April 24, 2013

Heartfelt Creations Wednesday

Hi everyone!

This is my second post for today!  If you are looking for my Word Art Wednesday Guest Designer Card, you can scroll down to the next post!

It's time for some inspiration with Heartfelt Creations!  (Warning...this is a long post!)  I have 2 projects to show you this week, the first is a flower pot "pocket" card!  This is the card with the insert placed inside only showing "You" on it.


You can click on any of the photos for a closer view


Here's a picture of the insert.


The back...


A close-up of the flowers...


I know most people put all the flowers on the top of the insert to look like a pot of flowers, but I loved the way the flowers looked on the pot!  (Complete instuctions for this are at the bottom of the post.)


Next, I have a decorated wood tissue box cover that I call the "Summer Cottage Tissue Box".  I can totally visualize this sitting in a bedroom of a summer cottage at the beach.  I kept this kind of clean and simple because that's how I remember the cottages being in Maine and New Hampshire when I was growing up.

Here's a picture of the top that I decorated with designer paper and mini seashells.


Then I decorated the 4 sides of the box each with a different scene using the Balmy Breeze Collection of stamps and matching designer papers.  I stamped directly on the designer papers, then colored each scene with pencils and mineral spirits.


I'm submitting my Flower Pot Card to the Allsorts Challenge #203 - A Passion for Flowers.

Thank you for stopping by today!  I hope I have given you a little inspiration of some fun things you can make with this new Balmy Breeze Collection!  Please visit the Heartfelt Creations Blog to see all the beautiful creations by the Design Team this week!

Blessings!

Kathy


Flower Pot Card

Heartfelt Creations Products & Products Carried by HC:
HCPC 3532 – Beautiful You PreCut Set
HCPC 3500 – Open Vintage Floret PreCut Set
HCPC 3502 – Mini Vintage Floret PreCut Set
HCD 732 – Decorative Flower Pot Die
HCD 727 – Vintage Floret Die
HCDP1 – 232 – Balmy Breeze Paper Collection
Product ID: 159223 - Paper BlossomsMolding Mat
Product ID: 459222 - Paper BlossomsTool Kit
Product ID: 159723 – Art InstituteGlue – Dries Clear

Other Products Used:
Paper: Natural White (Neenah)
Ink: Onyx Black (VersaFine), Mocha Mama, Amareto (Powder Puffs)
Accessories: Decorative Labels One (Spellbinders), mineral spirits, adhesive pearls, Bow-Easy, Golden Maple Silk Ribbon (Really Reasonable Ribbon), scor-tape, Prismacolor Pencils: Peach Beige, Chocolate, Dark Brown

Instructions:
Cut 2 of the larger pots from the Decorative Flower Pot Dies using the designer papers.  Adhere together on the 2 sides and bottom edges with Scor-tape to make pocket and ink edges.  Cut 2 flower pot rims with coordinating designer papers and ink edges.  Glue these to the front and back of pot.  Stamp sentiment on designer papers and cut with Decorative Labels One as shown.  Cut a second piece the same way without stamping.  Cut small flower pot from designer paper and glue sentiment to small pot as shown.  Thread small piece of ribbon through top corner of sentiment die cut and tape in place.  Glue the second plain piece on the back to cover the taped part of the ribbon.  Add bow and pearl as shown.

For flowers, stamp from green designer paper and cut leaves with matching die.  Stamp flowers on Natural White with Black Onyx, color as desired and cut with matching dies.  Shape all and glue together as shown.


Summer Cottage Tissue Box

Heartfelt Creations Products & Products Carried by HC:
HCPC 3531 – Seascape PreCut Set
HCPC 3530 – Waters Edge PreCut Set
HCPC 3529 – Surfs Up PreCut Set
HCPC 3528 – Sand & Sea PreCut Set
HCDP1 – 232 – Balmy Breeze Paper Collection

Other Products Used:
Ink: Onyx Black (VersaFine), Amaretto, Mocha Mama (Powder Puffs)
Accessories: Unfinished wood tissue box (Jo-Ann Fabrics), extra small craft seashells, Santa’s Flesh Acrylic Paint (Delta), Mod Podge, foam brush, mineral spirits, glue gun, Prismacolor Pencils: Dark Green, Marine Green, Mineral Orange, Cool Greys, Muted Turquoise, Periwinkle, Slate Grey, Cloud Blue, Yellow Ochre, Seashell Pink, Beige Sienna, Nectar, Sandbar Brown, Peach Beige, Dark Brown, Espresso, Chocolate, Light Umber

Instructions:
Prepare tissue box by sanding any rough edges and wipe with towel.  Paint with Santa’s Flesh Acrylic Paint.  Cut 4 pieces of light green designer paper 5” x 5 5/8” (or to fit your box).  Use stamps to decorate each piece with scenes as shown or desired.  Color with pencils and mineral spirits.  Ink edges with Amaretto and Mocha Mama Inks.  Glue each piece to the sides of the box with Mod Podge.

Cut matching designer paper 4 13/16” square.  Tape in place on top of box, turn box upside down and trace opening on back of designer paper.  Remove paper and cut out opening.  Ink edges and add to top of box with Mod Podge.
Ink all edges again slightly inking box edges also.  Add mini seashells to top of box with glue gun.


Word Art Wednesday Challenge #77 - Psalm 103:2

Happy Wednesday everyone!

This is my last post as a Guest Designer for Word Art Wednesday!  It's been a fun month of creating with the beautiful word art they provide to us!  I really love the font on this Psalm 103:2 verse for this week!


Click on picture for a better look


I made this card with a rich brown monotone.  The ribbon looks a little red in the picture, but it's actually a gorgeous brown color.  The flowers are from an older JustRite Stamp called Plant a Little Love that I colored with pencils and mineral spirits.  The image was then fussy cut, shaped and "popped" on the die cut with the verse.  The background is a piece of tan cardstock that I embossed with the Paper Lace II Embossing Folder and inked with Mocha Mama Ink.

Card recipe:

Stamps: Plant a Little Love (JustRite)
Paper: Very Vanilla, Early Espresso (SU), tan (stash)
Ink: Onyx Black (VersaFine)
Accessories: Brown Sheer Organza with Satin Center (Really Reasonable Ribbon), Paper Lace II Embossing Folder (Cuttlebug), charm, brad, adhesive pearls (Recollections), Bow-Easy, Brown Gala Glitz (Art Glitter), Decorative Labels 8 (Spellbinders), mineral spirits, Prismacolor Pencils: Peachy Beige, Light Umber, Dark Brown, Espresso, Black

If you would like to join in the challenge this week you can use the word art they provide on their Blog or anything uplifting/encouraging.  You can read more about it here on their Blog and also see all the beautiful creations from the talented design team!

I'm joining in on the following challenges:

Allsorts Challenge #203 - A Passion for Flowers
Tuesday Throwdown Challenge #144 - Make Your Own Background

Blessings!

Kathy

Tuesday, April 23, 2013

ODBDSLC151 - God's Nature

Happy Tuesday!

It's time for a new Shining the Light Challenge at Our Daily Bread Designs!

This week's challenge is:
Cherish God’s Nature- Create a card or project with nature and scripture/ spiritual quote.

To make the challenge even more fun, we will be giving out a prize, a $15 gift certificate to be used toward stamps at the Our Daily Bread Designs store!! Entries for the prize must be submitted by Sunday, April 28 at 8 p.m. EST. One random winner will be chosen and announced next Saturday.

While it is not required to use Our Daily Bread Designs images and sentiments on your creations, we would love to see them if you have them. As a way of recognizing those who do use Our Daily Bread Designs stamps, we will again be choosing three or more of our participants for the Shining the Light Award . In order to qualify for this award or join the challenge, however, you must use Our Daily Bread stamps and have your submission added to Mr. Linky by Sunday, April 28 at 8 p.m. EST. If you upload your creations to Splitcoast Stampers or any other online gallery, please use the keyword is ODBDSLC151. When creating your posts on blogs please include a link to the challenge.

Here is my card for the challenge this week:


Click on photo for a better view


I used an older set, "On Eagle's Wings", with this beautiful eagle and verse.  The eagle image is colored with pencils and mineral on a piece of tan designer paper so the white pencil would show up.  I fussy cut the image, shaped it a little and added it over the Scripture with pop dots.  Here's a close up:


Here is a picture of the stamp set:


I wanted this to be a masculine card so I didn't add much for embellishments.  I did add a twine bow and some metal stickers, but I think it still masculine enough!

Card recipe:

Stamps: On Eagle's Wings (Our Daily Bread Designs)
Paper: Heritage Scrapper's Solution (HOTP), black, red (DCWV Stack)
Ink: Onyx Black (VersaFine), Amaretto (Powder Puffs)
Accessories: Paper Lace II Embossing Folder (Cuttlebug), black twine, metal stickers, Bow-Easy, Prismacolor Pencils: White, Black, Yellow Ochre, Goldenrod, Light Umber, Chocolate, Espresso

For more inspiration, please visit my design team sisters to see their beautiful creations this week.  You can also see all the creations together on the ODBD Blog!


Gloria Stengel - Guest Designer


Thanks for stopping by today!

Blessings!

Kathy

Monday, April 22, 2013

CottageCutz - Mother's Day Gift Card Holder

Happy Monday everyone!

I have a cute gift project today using CottageCutz Dies. 


This is a gift card holder that I made with the new Large Confectionery Bag. I first cut the bag using Nana's Kitchen Paper. Where this is single-sided paper, I cut an additonal piece (green polka dot) to glue on the inside. (You can skip this step by using double-sided paper.) I decorated the bag with a butterfly from the Butterfly Mini Die and branch and flowers from the Bluebird Die using Certainly Celery and Real Red Cardstock and a little piece of blue. These were shaped and glued to the front of the bag.

This is the bag alone.


Inside the holder is the Spring Butterfly Notecard that holds the gift card. I used a small glue dot to hold the gift card in place.


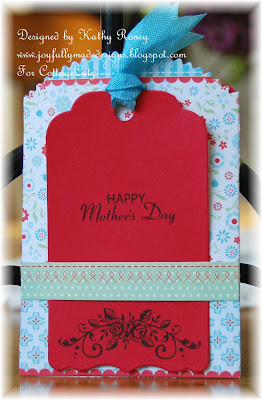
On the back I added a small strip of green paper to hold a tag. The tag is from the Fancy Insert Card/Tag. I stamped "Happy Mother's Day", added a rose flourish on the bottom, punched a hole and added a piece of ribbon.


These are the dies I used.


Project recipe:

Stamps: Vintage Rose Medallions (JustRite)
Paper: Nana's Kitchen (DCWV), Certainly Celery, Real Red (SU)
Ink: Onyx Black (VersaFine)
Accessories: White Opal Liquid Pearls, Scor-Tape, Peacock Seam Binding (Really Reasonable Ribbon)

I'm submitting this to the following challenges:

Really Reasonable Ribbon #70 - Mother's Day & Ribbon/Lace

Thank you for stopping by today!

Blessings!

Kathy
 

Sunday, April 21, 2013

Flourishes - Peach Roses

Hi there!

I made this Mother's Day Card for the latest Flourishes Timeless Tuesday Challenge #216 to "Frame It".


I used the Roses Are Red Set and colored them in peach shades with Prismacolor Pencils and mineral spirits.  I had my heart set on making peach colored flowers, but hopefully this doesn't look too pumpkin-y!  I used these beautiful Timeless Rectangles to frame the image and to create a mat frame.  I love the laciness of these dies.

Card recipe:

Stamps: Roses Are Red (Flourishes), Teeny Tiny Wishes (SU)
Paper: Neutrals Cardstock Stack, Mariposa Mat Stack (DCWV), Whisper White, Peach Parfait (SU)
Ink: Onyx Black (VersaFine)
Accessories: Timeless Rectangles (Spellbinders), distressing tool, Paper Lace II Embossing Folder (Cuttlebug), adhesive pearls (Want-2-Scrap), Bow-Easy, Olive Wrinkled Ribbon (Really Reasonable Ribbon), mineral spirits, Prismacolor Pencils: Light Peach, Peach, Mineral Orange, Pumpkin Orange, Pale Vermilion, Black, Kelp Green, Olive Green

I'm submitting this to the following challenges:

Flourishes FTTC216 - Frame It
Really Reasonable Ribbon #70 - Mother's Day & Ribbon/Lace
Addicted to Stamps & More #41 - Anything Goes

Thanks for stopping by today!  Tomorrow I'll have a cute little CottageCutz gift project to show you!

Blessings!

Kathy

Wednesday, April 17, 2013

Heartfelt Creations Inspiration

Happy Wednesday again!

This is my second post for today!  If you are looking for my Word Art Wednesday Card, please see the post below this!

It's time for some Heartfelt Creation inspiration!  Today I have a card and a coaster gift set.

Here is the card I created using a combination of the Seascape Set (chair & shells) and the Sand & Sea Set (flying seagulls) to make a little beach scene.  Doesn't this look like a peaceful place to be?  Other than the images, I left this card fairly simple.  I didn't want to cover up the beautiful scene!


My second project is a set of 4 tile coasters using the Balmy Breeze Collection of lighthouses and ship images.  This is a super simple project to make for a quick gift.  I usually apply a little color to these with the Stazon Inks, but you don't really need to.  These are the 4 together.


This  shows the back of the tile with the cork sheet applied.


This is how I packed them up for gift giving.  I just wrapped this wide ribbon around all 4 together and tied a simple bow...I didn't even use a Bow-Easy!  Then I added the tags with the sentiments stamped on them using Linen Thread and slipped a die cut of the Decorative Lattice Swirl Die using the designer paper.


You can find complete instructions for these at the bottom of my post.  Please visit the HC Blog to see all the gorgeous creations from the Designers this week! 

I'm submitting this to the Addicted to Stamps and More Challenge #41 - Anything Goes.

Thanks for stopping by today!

Blessings!

Kathy


Adirondack Chair

Heartfelt Creations Products & Products Carried by HC:
HCPC 3531 – Seascape PreCut Set
HCPC 3528 – Sand & Sea PreCut Set
HCDP1 – 232 – Balmy Breeze Paper Collection

Other Products Used:
Paper: Solar White (Neenah), Neutrals Cardstock Stack (DCWV)
Ink: Onyx Black (VersaFine)
Accessories: Sanding block, mineral spirits, Labels 23 Grand, Prismacolor Pencils: Green Ochre, Marine Green, Putty Beige, Sepia, Sandbar Brown, Seashell Pink, Beige Sienna, Nectar, Slate Grey, French Greys, Cool Greys

Instructions:
Base: Cut designer paper 6” x 10”, score at 5”, cut with Labels 23 Grand Die placing crease just over top of die to make a card base.

Image: On Solar White with Onyx Black, stamp chair, shells, and seagull images together as shown.  Color with pencils or as desired.  Cut image with Labels 23.  Add mats matching colors in designer papers.  Glue together and sand edges.  Add to card base with pop dots and add image to mats with pop dots.


Balmy Breeze Coasters
Heartfelt Creations Products & Products Carried by HC:
HCPC 3529 – Surfs Up PreCut Set
HCPC 3528 – Sand & Sea PreCut Set
HCPC 3527 – High Seas PreCut Set
HCPC 3532 – Beautiful You PreCut Set
HCDP1 – 232 – Balmy Breeze Paper Collection
HCD 732 – Decorative Flower Pot Die
HCD 733 – Decorative Lattice Swirl Die

Other Products Used:
Ink: Black Stazon, Onyx Black (VersaFine)
Accessories: Four - 4” x 4” porous tiles (Lowe’s), sand paper, paper towels, adhesive cork sheet (Michaels), Antique Gold Silky Crushed Ribbon (Really Reasonable Ribbon) or any wide ribbon, Linen Thread

Instructions:
Follow instructions for stamping on tiles technique at Split Coast Stampers: http://www.splitcoaststampers.com/resources/tutorials/tile_coasters/.   Sand any rough edges on coasters, if needed, then wipe clean.   With Stazon Ink, stamp various images on coasters (or do all the same) and let dry.  (You can also color the tiles with Stazon Inks as shown in the tutorial.)  Cut adhesive cork sheet into squares to fit the coaster bottoms and adhere.

For packaging, stack coasters and tie ribbon around and make a bow.  Stamps sentiments on designer paper with Onyx Black Ink and die cut with tag dies.   Attach to bow with linen thread.  Die cut Decorative Swirl from designer paper and slip under bow.  Adhere in place to the bow with a glue dot.

Word Art Wednesday - Philemon 1:4

Happy Wednesday everyone!

This is my third week as a Guest Designer for Word Art Wednesday!  This week's word art is from Philemon 1:4.


This is Paul writing to Philemon of his thankfulness for him.  This verse reminds me of those special people in my life that I am so thankful for.  My family, my Bible Study ladies, my friends here and in blogland.  I have so many sweet people in my life that encourage me, pray for me and I for them.  I am so blessed!

For my card, I used a MOJO Sketch from last year, #248.  Except for the bow and flower, it would make a nice guy card.  These Portobello Road Papers are perfect for masculine ones.

Card recipe:

Paper: Very Vanilla (SU), Portobello Road (Recollections)
Ink: Amaretto (Powder Puffs)
Accessories: Golden Maple Silk Ribbon (Really Reasonable Ribbon), Labels 20 (Spellbinders), Rose Leaf Punch (Martha Stewart), Vintage Floret Die (Heartfelt Creations), brad (Bo Bunny), Antique Copper Microbeads (Recollections), McGill Mat & Tool Kit, Bow-Easy, Scallop Border Punch, Square Lattice Embossing Folder (SU), piercer

Please visit the Word Art Wednesday Blog to see everyones beautiful creations this week using this word art. Hope you can join in the challenge! 

Blessings!

Kathy
 

Tuesday, April 16, 2013

JustRite Challenge JR094 - Sketch

Hi there!

I'm back with another card today!  This time I have a card I made for the latest challenge at JustRite Stamps which is a sketch.


(Click on photo for a closer look)

I love this rose image from the With Sympathy Set!  I decided to make the flowers in a teal color to make them vibrant and added a pretty golden yellow to go with it.  The image in colored with Prismacolor Pencils and mineral spirits.

Card recipe:

Stamp: With Sympathy (JustRite)
Paper: Whisper White, Sweet Pea Designer Series Paper (SU), teal (Recollections)
Ink: Onyx Black (VersaFine)
Accessories: Buttercup Liquid Pearls (Ranger), Silk Ribbon (May Arts), Labels 8, Decorative Labels 8 Dies (Spellbinders), adhesive pearls, Paper Lace II Embossing Folder (Cuttlebug), Bow-Easy, flower (Prima), mineral spirits, Prismacolor Pencils: Muted Turquoise, Cobalt Turquoise, Kelp Green

I'm submitting this to the following challenges:

JustRite #94 - Sketch
All Sorts Challange #202 - Letter of Your Name - roses for Roney
Simon Says Stamp Challenge - April Showers and/or Spring Flowers
Addicted to Stamps and More - #41 - Anything Goes

Thanks for stopping by today!

Blessings!

Kathy


ODBDSLC150 - Scripture or Hymn

Happy Tuesday everyone!

It's time for a new Shining the Light Challenge at Our Daily Bread Designs!


This week's challenge is: Use Scripture or Hymns on your creation

To make the challenge even more fun, we will be giving out a prize, a $15 gift certificate to be used toward stamps at the Our Daily Bread Designs store!! Entries for the prize must be submitted by Sunday, April 21 at 8 p.m. EST. One random winner will be chosen and announced next Saturday.

While it is not required to use Our Daily Bread Designs images and sentiments on your creations, we would love to see them if you have them. As a way of recognizing those who do use Our Daily Bread Designs stamps, we will again be choosing three or more of our participants for the Shining the Light Award . In order to qualify for this award or join the challenge, however, you must use Our Daily Bread stamps and have your submission added to Mr. Linky by Sunday, April 21 at 8 p.m. EST. If you upload your creations to Splitcoast Stampers or any other online gallery, please use the keyword is ODBDSLC150. When creating your posts on blogs please include a link to the challenge.

Here is my card for the challenge this week:


(Click on photo for a closer look)


I made a slider style card using scripture from the On Eagles' Wings Set.

For the sentiment inside, I used the Flourished Verses Set. 


Here's another photo of the card laying flat.


I had a little trouble with inspiration this week, so I made a trip to my local scrapbook store and found these pretty Authentique Papers called Cherish.  I love these papers with the roses and pinks!  I get a lot of my inspiration from designer papers and even though I have TONS already, LOL, I had to get more!  I did all the stamping directly on the solid designer papers.  Also, if you look closely, there is a faint eagle image with the verse on front.

Card recipe:

Stamps: On Eagles' Wings, Flourished Verses (Our Daily Bread Designs)
Paper: Natural White (Neenah), Cherish (Authentique), burgandy (DCWV), Always Artichoke
Ink: Onyx Black (VersaFine), Victoria Velvet Distress Ink
Accessories: Alway Artichoke Seam Binding (RAK from Jill :-), Elegant Scrollwork Die (Memory Box), Timeless Rectangles Dies (Spellbinders), button, Bow-Easy, jute, charm, brad

For more inspiration, please visit my design teammates and our Guest Designer, Gloria Stengel, to see their gorgeous creations this week.  You can also see all the creations together on the ODBD Blog.


I'm also submitting this to the following challenges:

Paper Playtime #8 - More Than One Fold
Whimsey Stamps Inspiration #58 - Pretty In Pink

Thank you for stopping by!

Blessings!

Kathy


Friday, April 12, 2013

CottageCutz Butterfly Trio

Happy Friday everyone!

Today I have a card to show you using CottageCutz's Butterfly Mini and Garden Bird Branch Dies

.

(Click on picture for a closer look)


I  originally planned to post another project, but it's taking a little longer than I thought lol!  While I was working on it, I thought of this idea with the butterflies and quickly put this card together! 

Here are the dies I used:


I love this Butterfly Mini!  The last time I used it I colored the pieces with chalk inks.  This time I used double-sided designer papers (Secret Garden) and slightly inked the edges.  I used the patterned side for the wings, and flipped the piece over to the solid side for the body.  I cut the Garden Bird Branch in Certainly Celery Cardstock and trimmed a little of the bottom off to fit on the card.

For the white base, I embossed a small portion of the bottom and stamped the sentiment on the top.  Then I just added some ribbons, lace, pearls, liquid pearls, and a button with a floss bow using two colors together.  I added a lavender mat (Secret Garden) and white to a So Saffron card base.  The finished card measures 4 1/2" x 4 1/2".

Card recipe:

CottageCutz Dies: Butterfly Mini, Garden Bird Branch
Stamp: With Graditude (Flourishes)
Paper: Whisper White, So Saffron (SU), Secret Garden (Graphic 45)
Ink: Onyx Black (VersaFine), Pumpkin Spice (VersaMagic), Green With Envy, Purple Passion, Banana Bliss (Powder Puffs)
Accessories: Button, floss, ribbon, lace, adhesive pearls (Kaiser), White Opal & Buttercup Liquid Pearls (Ranger), Bow-Easy, Square Lattice Embossing Folder (SU), Molding Mat & Tool Kit (McGill)

I'm submitting this to the following challenges:

Allsorts Challenge #201 - Spring Has Sprung
Really Reasonable Ribbon #69 - Buttons and Bows
Simon Says Stamp Challenge - April Showers and/or Spring Flowers

Thanks for stopping by today!

Blessings!

Kathy

Thursday, April 11, 2013

Thank You Lilies - Flourishes Summer Lovin Challenge

Happy Thursday everyone!

I made this for the Flourishes' Summer Lovin Challenge #FLLCAPR13 they are having for their new release.  The challenge is to use their photo for inspiration, which is a pretty green and salmon pink color combination, or a summer inspired creation.


I used an older set, A Year of Flowers 2, for the lily image and the With Graditude Set for the sentiment.  The image is colored with Prismacolor Pencils and mineral spirits.  Here's a close up of the lilies.


I love to color, especially flowers, and this is a pretty image for coloring.

Card recipe:

Stamps: A Year of Flowers 2, With Graditude (Flourishes)
Paper: Solar White (Neenah), Certainly Celery (SU), Eva Designer Paper (Basic Grey)
Ink: Onyx Black (VersaFine)
Accessories: Decorative Labels One (Spellbinders), Framed Tulips Embossing Folder, Certainly Celery Ribbon (SU), White Seam Binding (Really Reasonable Ribbon), Flower (Prima), mineral spirits, Prismacolor Pencils: Blush Pink, Crimson Lake, Pale Sage, Olive Green, Black

I'm entering this into the following challenges:

Flourishes Summer Lovin - #FLLCAPR13
Allsorts Challenge #201 - Spring Has Sprung
Simon Says Stamp - April Showers and/or Spring
Whimsy Inspiration #58 - Pretty in Pink

Thanks for stopping by!

Blessings!

Kathy
 

Wednesday, April 10, 2013

Heartfelt Creations - Balmy Breeze Collection

Happy Wednesday everyone!

This is my second post for today.  If you are looking for my Word Art Wednesday Post, please scroll down to the next post!

Today we're absolutely delighted to bring you the Balmy Breeze Collection. Old world vintage has been combined with tranquil seaside scenes (including a rustic compass, beach chair, fantastic surf, beaming lighthouses) and the Balmy Breeze paper pack, composed of a neutral color palette of peach and mint hues. This set is perfect for the crafter that loves creating vintage projects or for the stamper looking to create a project for her favorite man.

Leave a comment on the Heartfelt Creations blog by April 16th and you will be eligible to win the entire release valued at $180.91

For my first creation with this collection, I have this beautiful lighthouse scene.


I love the soft beachy colors on the designer papers for this collection.  I did this lighthouse image is sepia tones to go with the papers for that beachy feel.  It is colored with Prismacolor Pencils and mineral spirits and die cut with Labels One and Decorative Labels One.  The sentiments are die cut with the tag dies from the new Decorative Flower Pot Dies, attached with linen thread and attached to a bow made from Crumb Cake Seam Binding.  You can find complete instructions at the end of this post.

Make sure to visit the Heartfelt Creations' Blog and leave a comment for a chance to win the collection.  Also, be sure to check out all the beautiful creations from the designers this week, they are GORGEOUS!

Blessings!

Kathy


Lighthouse

Heartfelt Creations Products & Products Carried by HC:
HCPC 3527 – High Seas PreCut Set
HCPC 3532 – Beautiful You PreCut Set
HCD 732 – Decorative Flower Pot Die
HCDP1 – 232 – Balmy Breeze Paper Collection

Other Products Used:
Paper: Solar White (Neenah), Neutrals Cardstock Stack (DCWV), Chocolate Malt Smooth (Coredinations)
Ink: Onyx Black (VersaFine)
Accessories: Labels One, Decorative Labels One (Spellbinders), Linen Thread, repurposed button, Bow-Easy, Crumb Cake Seam Binding, mineral spirits, Prismacolor Pencils: Peach Beige, Light Umber, Dark Brown, Espresso, Black

Instructions:
Base: Make 4 1/4" x 5 1/2" card base out of tan cardstock.  Cut mat with Chocolate Malt paper 5 3/8” x 4 1/8”.  Cut the “shell” designer paper 5 5/16” x 4 1/16”.  Cut bottom 1 ½” of shell paper across and flip over so that green in on top and shells are on the bottom.  Tape pieces together, wrap ribbon around it and adhere to back, then glue together on to mat.  Add mat to base with pop dots.
Image:  Stamp lighthouse image on Solar White with Onyx Black Ink.  Color with pencils or as desired.  Die cut with Labels One Die.  Cut Decorative Labels One out of tan cardstock for a mat for image.  Glue together and add to mat as shown with pop dots.
Embellishments: Fussy Cut 2 shells from designer paper and add as shown with pop dots.  Make bow and add button with twine bow.  Stamp sentiments on the designer papers and die cut with tag dies.  Add tags and bow as shown using a pop dot to keep the tags as shown.