Be Joyful

Rejoice in the Lord always. Again I will say, rejoice! Let your gentleness be known to all men. The Lord is at hand. Be anxious for nothing, but in EVERYTHING by prayer and supplication, with thanksgiving, let your requests be made known to God; and the PEACE OF GOD, which surpasses all understanding, will guard your hearts and minds through Christ Jesus. Philippians 4:4-7

These are verses I memorized years ago and they are written on my heart. There are times when I still need to remember not to be anxious, but I eventually listen to my heart saying these verses. I didn't really understand what the "peace of God" was until I experienced it. It's having peace inside you, even when you're going through heartbreaking situations and trials. It does "surpass ALL understanding" and you know it comes from GOD alone. Praise the Lord for His wonderful promises!


I love, love, love what I do. I am passionate about the things I create and the talents God has placed in me. I SO appreciate the time you take to look at my things and the comments you all leave me!

Blessings to you!

Kathy

Wednesday, April 29, 2015

Teal Botanical Roses - Heartfelt Creations


Happy Wednesday!

It's time for a little inspiration with Heartfelt Creations!  Today I have a card using the Everyday Heroes Paper Collection and Die along with the Botanical Rose stamp set.


I used all black card stock and the designer papers for the mats and flowers. The first mat is one of the card fronts from the papers and the second one is from the tags page of the designer papers. The sentiment and flowers were stamped on one of the light teal papers in the collection using black ink and heat embossing with clear embossing powder. (In looking at this now I wish I had added a little dark teal ink to the flower centers before adding the black microbeads, but it's too late now!)

I love this Everyday Heroes Die flourish frame! So beautiful in black against the light teal designer paper! I add this to the mat with pop dots, then added a pretty trim bow, Cut Mat Create leaf flourishes and the flowers arranged in the corner to frame the sentiment. The little spacer bead and black brad on the top center of the die cut adds a little finishing touch to accent the frame.

Here's a little close up of the flowers. Very simple flower shaping using the Deluxe Flower Shaping Kit and water.


Be sure to visit the HC Blog to see the beautiful projects by the designers this week!

I'm submitting this to the following challenges:

Word Art Wednesday Challenge #181 - Anything Goes Family Friendly

Thanks for stopping by!

Blessings!

Kathy


Teal Botanical Roses

Heartfelt Creations Products and Products Carried by HC:

HCPC 3651 - Botanical Rose Cling
HCPC 3532 - Beautiful You Cling
HCD1 761 - Everyday Heroes Die
HCD 758 - Botanical Wings Die
HCD1 750 - Cut Mat Create Die
HCD1 751 - Cut Mat Create Die
HCDP1 253 - Everyday Heroes Paper Collection
368770 - Scor-Pal
Deluxe Flower Shaping Kit
159723 - Art Institute Glue - Dries Clear

Other Products: Recollections black card stock, VersaFine Onyx Black Ink, Recollections Ebony Microbeads, Spellbinders Standard Circles Large, black trim, Bow-Easy Too, Recollections Detail Clear Embossing Powder, heat tool, black mini brad, silver spacer bead, water mister, Scotch Mounting Tape, Aleene's Paper Glaze, Fast Grab Tacky Glue.

Instructions: Card measures 4 1/4" x 5 1/2" using black card stock. Cut card front from paper collection, ink edges with black ink and glue to card base. Cut teal rectangle from paper collection that measures 3 1/8" x 4 3/8" (it has a globe in the corner) and ink edges with black. Cut mat for this using black card stock measuring 3 5/16" x 4 9/16", glue to rectangle and add to card using mounting tape. Die cut frame from Everyday Heroes Die using black card stock and add as pictured using Mounting Tape. Stamp sentiment from Beautiful You set on light teal designer paper with Onyx Black Ink and heat emboss with Detail Clear Embossing Powder. Die cut with Standard Circles Large Die and glue to black frame.

On light teal designer paper using Onyx Black Ink, stamp Botanical Rose flowers and heat emboss with Detail Clear Embossing Powder. Die cut flowers with Botanical Rose Die, spray back of flowers with water and shape with Deluxe Flower Shaping Kit. Once dry, glue flowers together to form 3 different size flowers as pictured. Make a 3-loop bow with black trim using Bow-Easy Tool, then add to lower right with Fast Grab Tacky Glue. Add flowers as pictured using Art Institute Glue (AIG). Die cut 2 of the small leaf from the Cut Mat Create 2A Die and 1 of the small vines from the Cut Mat Create 1B Die. Add these under flowers as pictured using AIG. Glue the spacer bead to black frame as pictured using Aleene's Paper Glaze. Clip off the tines from the back of the brad and glue to spacer bead using Aleene's Paper Glaze.

Wednesday, April 15, 2015

Yellow Daisies Gift Set - Heartfelt Creations


Happy Wednesday!

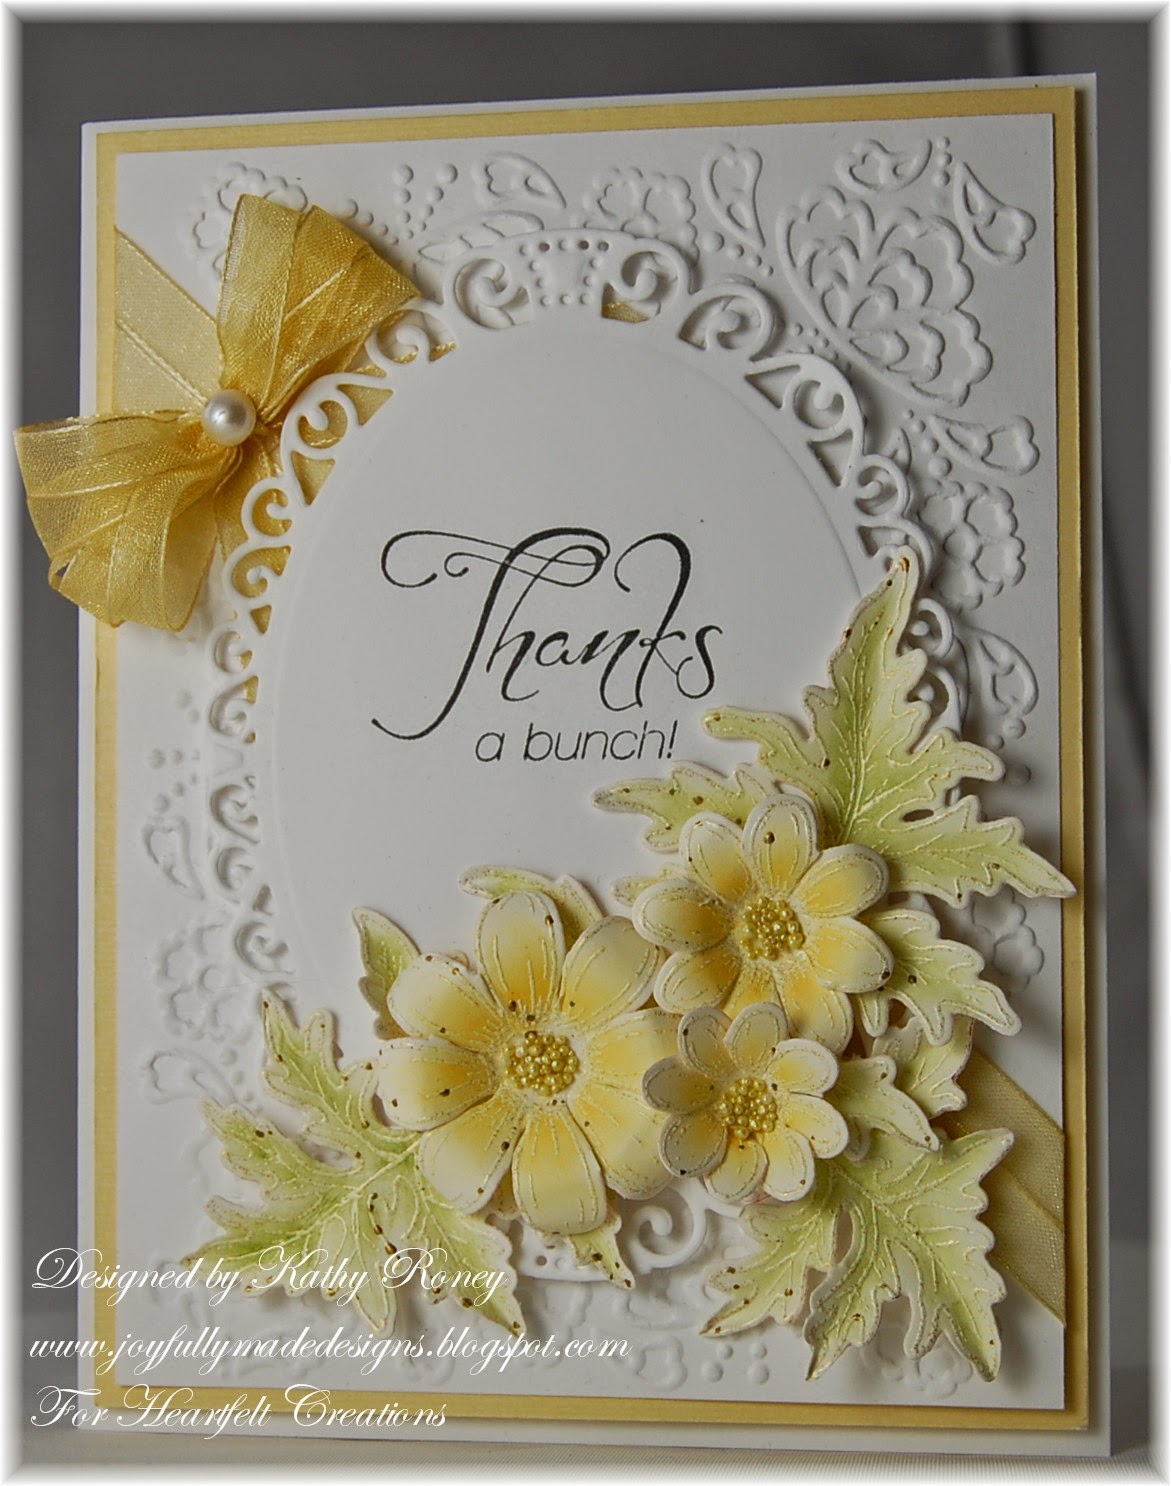
It's time for a little inspiration from Heartfelt Creations! This week I have a card and gift bag set using yellow daisies.


I used the Delightful Daisies Set and matching die for the flowers. They were stamped with VersaMark on Natural White card stock and embossed with Aged Ivory Embossing Enamel. I tried using the regular white card stock, but it was too bright. I like the way it came out on the Natural White much better even though I used white card stock for the rest.

The daisies and leaves were colored with Mango Madness and Tea Leaves chalk inks using make-up applicators. I used the Deluxe Flower Shaping Kit and a pencils to shape the flowers and leaves after spritzing the back with water. Once the flowers are dry, they retain their shape really well.

The sentiment on the card is from the Heartfelt Expressions Set. I used a thank you sentiment, but this would be great for a birthday or Mother's Day too.

Here's a separate picture of the card.


Here's a picture of the mini gift bag. I used a pre-made gift bag and decorated the front of it to match the card.


Here's a little close-up of the flowers on the card.


Be sure to visit the HC Blog to see all the beautiful creations by the designers this week! There are some fun projects there using the Everyday Hero Collection!

I'm submitting this to the following challenges:

Word Art Wednesday Challenge #179 - Anything Goes

Thanks for stopping by to visit! I hope this gives you a little inspiration!

Blessings!

Kathy


Yellow Daisy Thank You

Heartfelt Creations Products and Products Carried by HC:

HCPC 3656 - Delightful Daisies Cling
HCPC 3474 - Heartfelt Expressions Cling
HCD 760 - Delightful Daisy Die
368770 - Scor-Pal
Deluxe Flower Shaping Kit
159723 - Art Institute Glue - Dries Clear


Other Products: Paper: White (Recollections), Natural White (Neenah), yellow (DCWV Stack); Ink: VersaMark, Mango Madness, Tea Leaves (VersaMagic), Onyx Black (VersaFine); Accessories: Elegant Ovals (Spellbinders), Ditsy Dots Embossing Corner Folder (Tattered Lace), Bow-Easy Tool, heat tool, Aged Ivory Embossing Enamel (Stampendous), yellow sheer ribbon, adhesive pearl, water mister, glue dots, Scotch mounting tape, tape, make-up applicators, pencil.

Instructions: Card measures 4 1/4" x 5 1/2" made with white card stock. Cut yellow card stock mat measuring 4 1/16" x 5 5/16". Cut white mat measuring 3 7/8" x 5 1/8". Emboss white mat with Ditsy Dots Corner Embossing Folder on the top left and again on the bottom right. Wrap two pieces of yellow ribbon across mat at an angle between the embossed areas and secure in back with tape. Glue two mats together and add to card base with mounting tape. Stamp sentiment on white card stock with Onxy Black Ink and die cut with second largest Elegant Ovals Die. Add to card as pictured with Mounting Tape.

Stamp Delightful Daisy flowers and leaves (2 small and 1 large) on Natural White with VersaMark and heat emboss with Aged Ivory Embossing Enamel heating from underneath. Color 3 different size small flowers with Mango Madness Ink using make-up applicators, fading color out to petal tips. Die cut flowers with Delightful Daisy Die and clip between petals. Mist back of flowers with water and shape with Deluxe Flower Shaping Kit and use a pencil to roll the petals as pictured. Once dry, add Lemon Chiffon Prills to flower centers using Art Institute Glue (AIG). Color leaves with Tea Leaves Ink using make-up applicators and cut with matching die. Mist back of leaves with water and shape with Deluxe Flower Shaping Kit and fingers. Once leaves and flowers are dry, add to card arranging as pictured using AIG. Make multi-loop bow with yellow ribbon using Bow-Easy Tool and adhere with glue dots. Add adhesive pearl to bow center using glue dots.


Yellow Daisy Mini Gift Bag

Heartfelt Creations Products and Products Carried by HC:


Other Products: Paper: White (Recollections), Natural White (Neenah), yellow (DCWV Stack); Ink: VersaMark, Mango Madness, Tea Leaves (VersaMagic); Accessories: White Mini Craft Bag 4" x 3" (The Paper Studio), Perfect Polka Dots Embossing Folder (Stampin Up), Bow-Easy Tool, heat tool, Aged Ivory Embossing Enamel (Stampendous), yellow sheer ribbon, adhesive pearl, water mister, glue dots, Scotch mounting tape, tape, make-up applicators, pencil.

Instructions: Gift bag measures 4" x 3" plus handle. Cut yellow mat measuring 3 13/16" x 2 13/16". Cut white mat measuring 3 5/8" x 2 5/8" and emboss with Perfect Polka Dots Embossing Folder. Glue mats together and add to bag front with Mounting Tape.

Stamp Delightful Daisy flowers and leaves (2 small and 1 large) on Natural White with VersaMark and heat emboss with Aged Ivory Embossing Enamel heating from underneath. Color 3 different size small flowers with Mango Madness Ink using make-up applicators, fading color out to petal tips. Die cut flowers with Delightful Daisy Die and clip between petals. Mist back of flowers with water and shape with Deluxe Flower Shaping Kit and use a pencil to roll the petals as pictured. Once dry, add Lemon Chiffon Prills to flower centers using Art Institute Glue (AIG). Color leaves with Tea Leaves Ink using make-up applicators and cut with matching die. Mist back of leaves with water and shape with Deluxe Flower Shaping Kit and fingers. Once leaves and flowers are dry, add to card arranging as pictured using AIG. Make multi-loop bow with yellow ribbon using Bow-Easy Tool and adhere as pictured with glue dots. Add adhesive pearl to bow center using glue dots.


Wednesday, April 8, 2015

Heartfelt Creations New Release - Everyday Heroes Collection


Happy Wednesday!

It's time for the new release for April, the Everyday Heroes Collection!

Do you have an unsung hero in your life? Your champion may never have a medal pinned to his or her chest, but you can demonstrate your gratitude with the Everyday Heroes Collection from Heartfelt Creations. These epic stamps, dies and papers salute the extraordinary "ordinary people" who inspire us as they live their daily lives with honor and integrity. Greys, teals, khakis, creams and browns have been blended with distressed newsprint, vintage maps, globes, sailing ships, timepieces, combat boots, stripes, dots and flourishes to create a rugged, paper collection that is timeless in its appeal. Six deeply etched cling stamp sets featuring detailed collages, inspiring sentiments and unique circular elements mesh perfectly with the paper collection and matching set of dies. Let's sing the praises of the unsung heroes in our lives with the Everyday Heroes Collection from Heartfelt Creations!

This is a wonderful collection to use for masculine projects, but it also can be used for feminine projects more like my card this week.


I used the designer paper for my card, cutting a corner of one of the 12" x 12" papers. I love the floral image on this and the beautiful colors. I stamped one of the new sentiments on it and added some ribbons, trim and mats to match the colors. Very simple card to put together!

Be sure to visit the HC Blog to see all the wonderful projects by the designers this week! What a creative bunch we have!

I'm submitting this to the following challenge:

Word Art Wednesday Challenge #178 - Anything Goes

Thanks for stopping by to visit!

Blessings!

Kathy


Only One Like You

Heartfelt Creations Products and Products Carried by HC:

HCPC 3666 - Everyday Hero Cling
HCDP1-253 - Everyday Heroes Paper Collection
368770 - Scor-Pal

Other Products:

Paper: off-white, brown (DCWV Stack), teal (Coredinations)
Inks: Black Onyx (VersaFine), Frayed Burlap Distress
Accessories: Scotch Mounting Tape, Scor-Tape, glue dots, Aleene's Fast Grab Tacky Glue, Bow-Easy Tool, Dark Brown Jute String (Really Reasonable Ribbon), 3/8" brown ribbon, brown twine, teal trim (Jo-Ann's), Bisque and Platinum Liquid Pearls.

Instructions: Card measures 4 3/4" x 6". Cut brown card stock 4 3/4" x 12", score at 6" and fold. Cut off-white mat 4 9/16" x 5 13/16", teal mat 4 3/8" x 5 5/8" and glue together. Using designer paper with roses in all 4 corners, cut upper left corner measuring 4 3/16" x 5 7/16". Stamp sentiment on lower right, ink edges with Frayed Burlap Ink and glue to mats. Wrap 2 pieces of brown ribbon across as pictured and adhere with Scor-Tape. Cut piece of teal trim to fit across ribbon center and adhere with Scor-Tape. Make 3-loop bow with Dark Brown Jute String and another with Soapstone Seam Binding next size bow down. Add as pictured using Aleene's Fast Grab Tacky Glue. Thread brown twine in button and glue to bow center with glue dots. Dot small flowers on designer papers with Liquid Pearls.

Wednesday, April 1, 2015

Peacock Swirls Step Card - Heartfelt Creations


Happy Wednesday!

It's time for a little Heartfelt Creations inspiration! Today I have a center step card using the Peacock Paisley Collection!


The main image is from the Peacock Swirls Set that I heat embossed with Aged Ivory Embossing Enamel on Natural White Cardstock and colored with chalk ink. I love this technique, so soft and elegant! I did the same with the Delightful Daisies flowers and leaves and the butterfly from the Butterfly Medley Set. The aqua mats for the 2 side and bottom front were done the same way without coloring. I also added dots of Bisque Liquid Pearls.

Here's a close up of the flowers for you.


It so disappointing when the camera doesn't capture the beauty of something I've created. This is much prettier in real life.

Be sure to visit the HC Blog to see all the beauties by the designers this week! Also, Emma Lou has a sneak peek of the new collection being released next week, Everyday Heroes Collection.

I'm submitting this to the following challenges:

Word Art Wednesday Challenge #177 - Anything Goes

Thanks for stopping by!

Blessings!

Kathy


Peacock Swirls Step Card

Heartfelt Creations Products and Products Carried by HC:

HCPC 3661 - Feathery Peacock Cling
HCPC 3660 - Peacock Swirls Cling
HCPC 3656 - Delightful Daisies Cling
HCPC 3650 - Butterfly Medley Cling
HCPC 3616 - Vines and Blooms Cling
HCD 760 - Delightful Daisy Die
HCD 759 - Butterfly Medley Die
368770 - Scor-Pal
Deluxe Flower Shaping Kit
159723 - Art Institute Glue - Dries Clear
Other Products:

Paper: Natural White (Neenah), White Linen (Recollections), aqua (DCWV Stack)
Ink: VersaMark, Oasis Green, Turquoise Gem, Night Sky, Thatched Straw, Tea Leaves (VersaMagic)
Accessories: Bisque Ivory Liquid Pearls, Aged Ivory Embossing Enamel (Stampendous), heat tool, sanding block, Bow-Easy Tool, make up applicators, Timeless Rectangles Die, Grand Calibur (Spellbinders), glue dots, 3M mounting tape, Aleene's Fast Grab Tacky Glue, fibers (my stash).

Instructions: Card measures 6" x 6 1/4". Use White Linen card stock and the Center Step Card Tutorial found here ( http://www.splitcoaststampers.com/resources/tutorials/centerstepcard/ ) using the following adjusted measurements: start with 6" x 12" piece of White Linen, on short side cut 1" in on each side from 1" to 7", score along each long side at 1", 2", and 7", score between cut lines at 6".

Cut mats with aqua card stock as follows: (1) 7/8" x 5 7/8", (2) 7/8" x 4 3/4", (1) 3 7/8" x 5". Using VersaMark Ink and heat embossing with Aged Ivory Embossing Enamel (from underneath), do the following: daisy vine (Vines and Blooms Set) on the 7/8" x 5 7/8" piece, peacock feather (Feathery Peacock Set) on the two 7/8" x 4 3/4" (as pictured). Sand edges of all four aqua pieces with sanding block and glue to card base.

With Natural White card stock die cut Timeless Rectangles largest die. Stamp peacock image (Peacock Swirls Set) with VersaMark Ink and heat emboss with Aged Ivory Embossing Enamel, color with chalk inks and add to card base with mounting tape. On Natural White with Versamark Ink, stamp flowers, one large leaf, 2 small leaves (Delightful Daisies Set), butterflies (Butterfly Medley Set) and heat emboss with Aged Ivory Embossing Enamel (from underneath). Color 4 of the flowers, the leaves and one small butterfly using chalk inks. Die cut pieces with matching dies and shape with flower shaping kit. Add leaves and 3 of the flowers to image as pictured gluing in place with Art Institute Glue (AIG). Add butterfly as pictured gluing (body only) with AIG. Add Minnie Pearl Prills to flower centers and butterfly body using AIG. Make multi-loop fiber bow with Bow-Easy Tool and add as pictured using glue dots. Add remaining flower to bow center with Fast Grab Tacky Glue. Add Bisque Liquid Pearls to flower centers on images, butterfly antennae, trailing from butterfly or as desired.