Be Joyful

Rejoice in the Lord always. Again I will say, rejoice! Let your gentleness be known to all men. The Lord is at hand. Be anxious for nothing, but in EVERYTHING by prayer and supplication, with thanksgiving, let your requests be made known to God; and the PEACE OF GOD, which surpasses all understanding, will guard your hearts and minds through Christ Jesus. Philippians 4:4-7

These are verses I memorized years ago and they are written on my heart. There are times when I still need to remember not to be anxious, but I eventually listen to my heart saying these verses. I didn't really understand what the "peace of God" was until I experienced it. It's having peace inside you, even when you're going through heartbreaking situations and trials. It does "surpass ALL understanding" and you know it comes from GOD alone. Praise the Lord for His wonderful promises!


I love, love, love what I do. I am passionate about the things I create and the talents God has placed in me. I SO appreciate the time you take to look at my things and the comments you all leave me!

Blessings to you!

Kathy

Wednesday, December 25, 2013

Believe - Heartfelt Creations


Merry Christmas!

I hope everyone is having a wonderful Christmas with family and friends!  We're looking forward to a fun day together here in our new home!

Today I have a Christmas card to show you for Heartfelt Creations using one of the card fronts in their Christmas Card Collection Designer Papers. 


These card fronts make card making so easy!  I didn't do any stamping or anything on this!  I cut the card front from the designer paper, matted it with tan cardstock, wrapped it with some twine, and added it to a card base with pop dots.  It doesn't get much easier than that!

To embellish my card, I added bows, a button with twine, and a tag also cut from the designer paper.

I'm submitting this to the following Challenge:

Word Art Wednesday Challenge #112 - Anything Goes

I pray you all have a wonderful and blessed Christmas!

Blessings!

Kathy

Believe

Heartfelt Creations Products and Products Carried by HC:

HCDP1 236 - Christmas Card Paper Collection
Product ID: 452255 – Grand Calibur
Product ID: 368770 – Scor-Pal

Other Products Used:
Paper: Early Espress (SU), tan (Recollections)
Ink: Forest Moss Distress Ink (Ranger)
Accessories: Brown Sheer Organza with Satin Center, Moss Jute String (Really Reasonable Ribbon), twine (American Crafts), Bow-Easy, sponge, button

Instructions: Card measures 5 3/8" x 5 3/8" square with Early Espresso cardstock.  Cut card front (shown) from designer paper, ink edges with Forest Moss, and mat with tan cardstock measuring 5 3/16" x 5 3/16".  Wrap jute string around card front/mat three times as shown and secure in place.  Add to card base with pop dots.  Cut sentiment tag from designer paper and add as shown with pop dots.  Add bows with ribbon, jute string, and button with twine bow.


Sunday, December 22, 2013

All About Christmas


Happy Sunday everyone!

Today I have a couple of Christmas projects to show you!  The first is a very simple card I made for MY Christmas Cards this year!  I wanted something elegant and simple...this is what I came up with!


I just love the white and red combination on this showing the beautiful Elegant Flurry Snowflake Die cut.  Very easy card to put together!  I used a red card base and a white mat partially embossed with a snowflake die.  I stamped a sentiment on the bottom, wrapped some red ribbon around the mat, then added the snowflake and a bow!

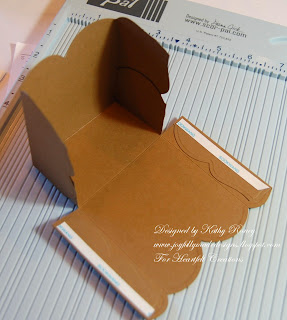
My second project is a gift card holder I made using the Fancy Envelope Die, my new FAVORITE die!  It's perfect as a gift card holder, I love it!  I know I'll be using this one a lot!


To make the holder, I cut the envelope with white cardstock and again with some Christmas designer paper (Botanical Noel by Recollections).  I trimmed the designer paper piece to cover the flap and another piece for the back (taken from the inside of the pocket). 

The Poinsettia Spray was cut with various cardstock scraps that were shaped and slightly inked.  I also cut a bow with red cardstock using the Homemade Christmas Gift Set and added a button with a twine bow.   I also cut an additional poinsettia flower to decorate the flap with a couple of leaves.

These are the dies I used:


http://www.scrappingcottage.com/images/products/detail/GiftSet01.jpg


http://www.scrappingcottage.com/cottagecutzelegantflurrysnowflakeelites.aspx

http://www.scrappingcottage.com/cottagecutzpointsettiaspray4x4.aspx


(Note: I don't have a picture of the Fancy Envelope Die.)
 
I'm submitting this to the following challenges:

Word Art Wednesday Challenge #111 - Anything Goes.
Addicted to Stamps and More Challenge #76 - Anything Goes

Project recipes:

CottageCutz Dies: Elegant Flurry Snowflake, Poinsettia Spray, Fancy Envelope, Homemade Christmas Gift Set, Fancy Envelope
Stamp: Christmas Candles (Flourishes)
Paper: White, Cream, Botanical Noel (Recollections), Real Red, So Saffron (SU), Ruby Red, Rain Forest (Bazzills)
Ink: Onyx Black (VersaFine), Real Red (SU), Forest Moss Distress Ink (Ranger)
Accessories: Snowflake #8 Embossing Folder (Sizzix), button, twine, Bow-Easy, Ombre Red Stitched Sheer Satin Ribbon (Really Reasonable Ribbon)

I hope you enjoyed by projects today and I have you a little inspiration!  Thank you for stopping by!

Blessings!

Kathy


Wednesday, December 18, 2013

Key to My Heart


Happy Wednesday everyone!

Can you believe Christmas is only a week away?  Yikes, I'm so not ready for it!  Hopefully you're more prepared than I am!


Well, it's Wednesday, and that means it's time for some Heartfelt Creations inspiration!  Today I have a card I made using three of the Floral Key Collection stamp sets: Keys and Roses, Journey of Love Keys, and Burnished Key Sets. 


I wanted to place these images together and have the Timeless Rectangles Die framing it for something simple and elegant.  I stamped the images on white cardstock and colored them in pencils using pinks, browns, and a little green.  I love this flowered key image, it's one of my favorites from the collection.  I added the extra heart lock and keys "popped" on top of the original images.

I'm submitting this to the following challenge:

Word Art Wednesday Challenge #111 - Anything Goes

Thank you for stopping by!

Blessings!

Kathy


Key to My Heart

Heartfelt Creations Products and Products Carried by HC:

HCPC 3571 - Keys and Roses PreCut Set
HCPC 3574 - Journey of Love Keys PreCut Set
HCPC 3569 - Burnished Key PreCut Set
HCD 741 - Burnished Key Die
Product ID: 031458 - Timeless Rectangles Dies
Product ID: 452255 – Grand Calibur
Product ID: 368770 – Scor-Pal

Other Products Used: Paper: Solar White (Neenah), Neutrals Stack (DCWV); Ink: Onyx Black (VersaFine); Accessories: adhesive pearls, fibers, Bow-Easy, mineral spirits, Prismacolor Pencils: Rosy Beige, Clay Rose, Chestnut, Kelp Green, Marine Green, Black, Sepia, Espresso

Instructions: Card measures 6 1/4" x 4 1/4" with pink cardstock.  Die cut brown cardstock with Timeless Rectangles Die.  Stamp images on Solar White with Onyx Black placing as shown.  Cut with Timeless Rectangles Die and trim outside edges.  Color with pencils.  Color lock and keys with pencils and cut with matching die.  Add to images with pop dots.  Add image to brown die cut with pop dots.  Wrap pink fibers around both as shown and secure to back.  Add to card base with pop dots.  Add bow and adhesive pearls as shown.

Thursday, December 12, 2013

Elegant Christmas Bell


Happy Thursday!

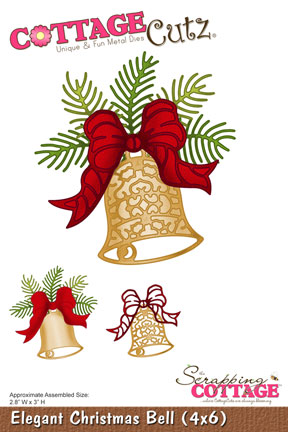
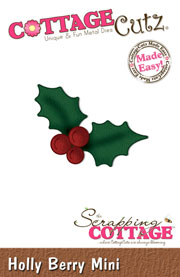
Today I have a Christmas card for you using Elegant Christmas Bell, Holly Berry Mini, and The Homemade Christmas Gift Set dies from The Scrapping Cottage.


(Click on photo for a better view)


For my card I started with a red base and added a white mat embossed with a snowflake die.  The Merry Christmas sentiment is cut using The Homemade Christmas Gift Set and red cardstock.  I ran it through my XYRON Create-a-sticker machine to make it easier to adhere to the card.  The Elegant Christmas Bell was cut with red and green cardstock and gold designer paper from Glad Tidings Mat Stack.  I glued the bell to the mat and then added branches that were inked with green and shaped a little.  The bow was inked with red and shaped it a little before adding it the to bell with pop dots.

I wrapped the plaid ribbon around the mat and added a bow made with the Bow-Easy.  I used the Holly Berry Mini with red and green cardstock to add holly to the bow center after shaping them a little with my fingers and a stylus. 

To finish the card off I added a button with a floss bow.

These are the dies I used.

http://www.scrappingcottage.com/cottagecutzelegantchristmasbell4x6.aspx


http://www.scrappingcottage.com/cottagecutzhollyberryshapemini.aspx


http://www.scrappingcottage.com/cottagecutz-homemade-christmas-gift-set.aspx


Card recipe:

Paper: White (Recollections), Rain Forest, Ruby Slipper (Bazzills), Glad Tidings Mat (K & Co)
Ink: Real Red (SU), Vintage Photo Distress, Forest Moss Distress (Ranger)
Accessories: Ribbon (Michaels), Bow-Easy, floss, adhesive pearl (Recollections), Snowflakes #8 Embossing Folder (Sizzix), XYRON Create-a-sticker.

I'm submitting this to the following challenges:

Word Art Wednesday Challenge #110 - Anything Goes.

Thanks for stopping by!

Blessings!

Kathy

Wednesday, December 11, 2013

Especially for You - Heartfelt Creations


Happy Wednesday everyone!

It's time for a little inspiration from Heartfelt Creations!  This week I have another card made with the new Floral Key Collection.  This time I used blues with the beautiful browns in the collection.


Click on photo for a better view
 

The mat behind the images is one of the card fronts from the designer papers.  These card fronts make things a lot easier!  The flower image was colored with pencils and fussy cut.  The key is an extra key colored and popped over the image.  The sentiment oval was stamped on the designer paper, colored, and a extra key was popped over it.

Be sure to visit the Heartfelt Creations Blog to see all the beautiful creations by the designers this week!

I'm submitting this to the following challenges:

Word Art Wednesday Challenge #110 - Anything Goes

Thanks for stopping by!

Blessings!

Kathy

Heartfelt Creations Products and Products Carried by HC:

HCPC 3573 - Burnished Key Hole PreCut Set
HCPC 3572 - Floral Keys & Locket PreCut Set
HCPC 3569 - Burnished Key PreCut Set
HCD 741 - Burnished Key Die
HCDP1 238 - Floral Key Paper Collection
Product ID: 354802 - Classic Ovals Large
Product ID: 452255 – Grand Calibur
Product ID: 368770 – Scor-Pal

Other Products Used: Paper: Solar White (Neenah), brown (Bazzills), gray (Neutrals DCWV);
Ink: Onyx Black (VersaFine), Rich Cocoa (Memento); Accessories: Classic Scalloped Ovals Large (Spellbinders), button, Tobacco Seam Binding (Really Reasonable Ribbon), Bow-Easy, twine (May Arts), mineral spirits, Prismacolor Pencils: Periwinkle, Black, Kelp Green, Marine Green, Ginger Root, Light Umber, Chocolate, Dark Brown

Instructions:
Make 5 1/2" x 4 1/4" side fold card base with Brown Cardstock.  Cut card front from
designer paper, ink edges with Rich Cocoa, and mat with gray cardstock.  Wrap ribbon
around, secure to back, and add to base with pop dots.  Stamp flower and Burnished Key
images on Solar White with Onyx Black, and color with pencils.  Fussy cut flower image and
cut key image with matching die.  Add key to image with pop dots.  Stamp sentiment and
Burnished Key image on coordinating designer paper.  Cut key with matching die and ink
edges with Rich Cocoa.  Color sentiment with pencils and die cut with ovals die.  Ink
edges with Rich Cocoa and add scalloped oval die cut using gray cardstock.  Add key to
sentiment with pop dots.  Add bow, button, and twine as shown.


Wednesday, December 4, 2013

Prayer Journal - Heartfelt Creations


Happy Wednesday!

It's time for some Heartfelt Creations inspiration!  This week I have a spiral notebook that I bought at Michaels for $.50 and altered into a prayer journal.  The notebook is 6" x 6" so it's perfect for the 6" x 6" designer paper blocks in the Floral Key Paper Collection.  Here is the "before" picture showing how I removed the covers.


Here is the front of the book after altering it.  Looks a little bit nicer doesn't it?  You can click on the photos for a better view.


 Here is the inside cover with image of Matthew 7:7.


 Here are the back covers.


I'm submitting this to the following challenges:

Word Art Wednesday Challenge #109 - Anything goes

Thank you for stopping by!

Blessings!

Kathy


Heartfelt Creations Products and Products Carried by HC:

HCPC 3576 - A Prayer for the Day PreCut Set
HCPC 3574 - Journey of Love PreCut Set
HCPC 3572 - Floral Keys & Locket PreCut Set
HCPC 3569 - Burnished Key PreCut Set
HCPC 3571 - Keys & Roses PreCut Set
HCD 741 - Burnished Key Die
HCD 728 - Timeless Amour Die
HCDP1 238 - Floral Key Paper Collection
Product ID: 452255 – Grand Calibur
Product ID: 368770 – Scor-Pal

Other Products Used:
Paper: Solar White (Neenah), brown, gray
Ink: Rich Cocoa, Nautical
Blue (Momento), Jumbo Java (VersaMagic), Onyx Black (VersaFine)
Accessories: Aleene's Paper Glaze, Mod Podge, brush, bead spacer, adhesive pearl, trim (Jo-Anns), White Jute String, Soapstone and Tobacco Seam Binding (Really Reasonable Ribbon), blue twine, Sprial Punch (Stampin' Up), 6" x 6" spiral notebook (Michaels), sandpaper, Classic Ovals Large,
Classic Scalloped Ovals Large (Spellbinders), mineral spirits, Prismacolor Pencils: Black,
Sepia, Espresso, Rosy Beige, Clay Rose, Chestnut

Instructions:

Slightly open spiral ring of notebook to remove covers.  Prepare covers by sanding any
color and/or coating on edges.  Ink edges with brown ink.  For front cover, cut 6" x 6"
designer paper block and stamp lock image from Keys & Roses Set with Nautical Blue Ink on
lower left corner.  Punch spiral openings with Spiral Punch and adhere to cover with Mod
Podge.  Select 6" x 6" designer paper blocks for inside cover, back inside and outside
covers and repeat process of punching, inking, and adhering to covers.  For front cover,
on lighter shade of designer paper, stamp prayer sentiment with Nautical Blue and cut with
Ovals Die.  Ink edges with brown ink.  Stamp Burnished Key image on white cardstock with
black ink and cut with matching Burnished Key Die.  Color matching lock, key, and 2 other
keys with pencils and ink.  Add as shown with pop dots.  Cut Scalloped Ovals shapes from
brown and gray cardstock and add as shown to front cover.  For inside cover, stamp Matthew
7:7 image on white cardstock with brown ink and color with pencils.  Die cut with Ovals
Die, ink edges and add to cover as shown with a brown scalloped die cut behind it.  Stamp
heart image on white cardstock with black ink and color with pencils.  Cut with Timeless
Amour Die and add to inside cover as shown partially popped.  Stamp flowered lock image on
Solar White Cardstock with Onyx Black Ink, color with pencils, and fussy cut.  Color
matching locket and pop over image.  Add to cover partially popped and glued.  To finish
front, add spacer bead, adhesive pearl, trim, and mixture of ribbons and fibers tied into
bows.

Monday, December 2, 2013

Grandma's Goodies Tag


Happy Monday!

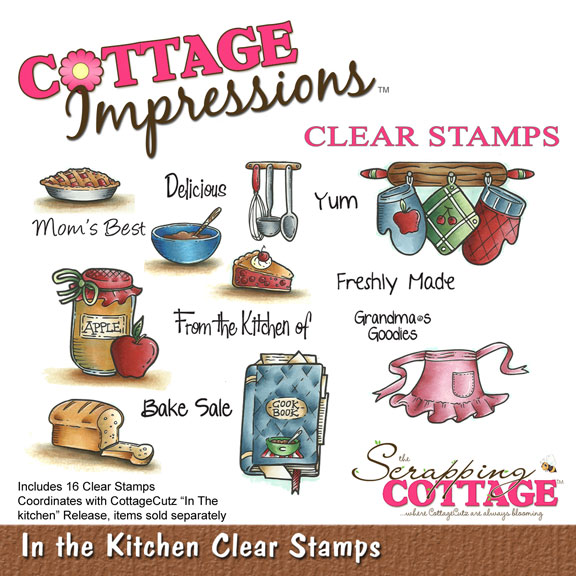
Today I have a cute gift tag I made using the Fancy Insert Card/Tag and In the Kitchen Clear Stamps by Cottage Impressions!


This tag die comes in handy for lots of things and I thought it would be perfect as a tag for baked goodies!  I LOVE the images from this stamp set, they're so cute and fun to color!  (Unfortunately, I just realized the stamp set is retired now!)

Here's a close up of the pie and cookbook images.


Aren't they cute?  I stamped them on white cardstock with black ink and colored them with pencils.  I then fussy cut them which was very easy, and inked the edges a little with black.

I die cut the tag using Visions of Christmas paper by K & Co. stamped it with "Grandma's Goodies" sentiment from the set, and inked the edges with brown ink.  I added the images to the tag with pop dots and added some baby rick rack.  I punched a hole in the tag and added some white jute for a tie and then added a bow, button and twine.

Here are the Scrapping Cottage stamp and die I used:


http://www.scrappingcottage.com/cottagecutzfancyinsertcardtagpre-order.aspx


Tag recipe:

CottageCutz Die: Fancy Insert Card/Tag
Stamps: In the Kitchen Clear Stamps (Cottage Impressions) (Retired)
Paper: Visions of Christmas (K & Co), Solar White (Neenah)
Ink: Onyx Black (VersaFine), Amaretto (Powder Puffs)
Accessories: Blue Jay Seam Binding, White Jute (Really Reasonable Ribbon), twine (May Arts), Bow-Easy, black baby rick rack (Wrights), white gel pen, button, hole punch, mineral spirits, Prismacolor Pencils: Cool Grey 10%, 90%, Black, Ginger Root, Light Umber, Chocolate, Yellow Ochre, Goldenrod, Denim Blue, Indigo Blue

I'm submitting this to the Really Reasonable Ribbon Challenge #85 - BINGO & Ribbon (White, Baker's Twine, Button)

Thanks for stopping by!

Blessings!

Kathy
 

Friday, November 29, 2013

My Wish For You


Happy Friday everyone!

I hope you all had a wonderful Thanksgiving!

We are pleased to present the Floral Key Collection.This collection contains a neutral color palette with card panels, papers, stamps and dies that will enable you to create quick cards while achieving the "wow" factor. The Floral Key Collection is a set of key and lock stamps and dies with a paper pack that contains a variety of card fronts, 6" x 6" pieces and 12" x 12" layouts with borders and frames. It's a creative, fun exploration of the vintage spirit. The Floral Key Collection will unlock your imagination to creating incredibly beautiful, "fine art" cards. Take advantage of extra savings when shopping with Heartfelt Creations on Black Friday.

Leave a comment on the Heartfelt Creations blog by December 3rd to be eligible to win the entire Floral Key Collection valued at $200. The winner will be announced on December 4th on the Heartfelt Creations blog.

Now for my first creation with this beautiful new collection!


The focal image on this is from the Floral Keys & Locket Set that I colored with pencils and mineral spirits and fussy cut.  There is also a second layer on the image from the Burnished Key Set along with the 2 keys in the top corner that were cut with the matching die.

And here's a little side view showing the different layers.


The ticket with the "Make a Wish" sentiment is cut from the designer paper.  So many beautiful elements in the designer papers to create with!  Both the main mat and the image mat are from the designer papers also.

Be sure to visit the HC Blog to see all the gorgeous creations by the designers this week and leave a comment for a chance to win the entire collection!

I'm submitting this to the latest Word Art Wednesday Challenge #108 - Anything Goes.

Thanks for stopping by!

Blessings!

Kathy


Heartfelt Creations Products and Products Carried by HC:

HCPC 3572 - Floral Keys & Locket PreCut Set
HCPC 3569 - Burnished Key PreCut Set
HCDP1 238 - Floral Key Paper Collection
HCD 741 - Burnished Key Die
Product ID: 452255 – Grand Calibur
Product ID: 368770 – Scor-Pal
Product ID: 354802 - Classic Oval Large Dies

Other Products Used: Paper: Natural White (Neenah), Frayed Burlap (Coredinations); Ink:
Onyx Black (VersaFine), Forest Moss, Victoria Velvet Distress Ink (Ranger); Classic
Scalloped Ovals Large (Spellbinders), buttons, bead spacer, adhesive pearls, trinket,
Bow-Easy, Cream Seam Binding, Ivory Satin w/Scallop Edge (Really Reasonable Ribbon),
sponge, mineral spirits, Prismacolor Pencils: Black, Kelp Green, Marine Green, Rosy Beige,
Chestnut, Sepia, Espresso

Card size for this project is 5 1/2" x 4 1/4", top folded, using Frayed Burlap Cardstock. 
Cut mat from 6" square designer paper trimming to 4 1/16" x 5 5/16", ink edges with Forest
Moss, wrap with ribbon, and glue to card base.  Trim card front from designer paper to 4"
x 2 7/8", ink edges, and add to card with pop dots.  Die cut Frayed Burlap with Classic
Ovals and then die cut Natural White with Class Scalloped Ovals and add to card with pop
dots. Stamp images on Natural White with Onyx Black.  Die cut Burnished Key image with
matching die and color 2 of the keys with inks.  Color the flower image with pencils and
fussy cut around image.  Ink edges of image with black.  Glue image to oval die cut and
slightly curl up edges.  Color matching locket for image with pencils and add with pop
dots.  Add keys to card as shown and add bead spacer with adhesive pearl. Trim "Make a
Wish" ticket from designer paper, ink edges, and add as shown slightly curling. Add bow,
trinket, and button as shown.
 

Friday, November 22, 2013

Jolly Penguin

Happy Friday everyone!

Today I have a Christmas card for you using the Jolly Penguin CottageCutz Die from The Scrapping Cottage!


Aren't these little guys cute delivering presents on their sleigh?  I love the little one sitting on the sleigh with his candy cane!


I used a bunch of different colored cardstocks for the die pieces and a little bit of designer paper called Botanical Noel by Recollections.  I inked and shaped most of the pieces before gluing them together.  I added an extra sleigh to go under the sentiment and added some adhesive pearls to embellish it.  I embossed the upper part of the white mat with Perfect Polka Dots to make it look like it was snowing behind the penguins, I then matted it with Ruby Red Cardstock from Bazzills and popped it on a green card base using Forest by Coredinations.


Here is a picture of the Jolly Penguin Die I used.


http://www.scrappingcottage.com/cottagecutzjollypenguin4x6.aspx


Supplies used:

CottageCutz Die: Jolly Penguin
Stamp: Teeny Tiny Wishes (SU)
Paper: Botanical Noel, white, black (Recollections), Forest (Coredinations), Ruby Slipper, gray, brown (Bazzills), More Mustard (SU)
Ink: Forest Moss Distress Ink, Amaretto, Banana Bliss (Powder Puffs), Real Red (SU), Gray Flannel(Memento)
Accessories: Ribbon, button snowflake, adhesive pearls (Recollections), Bow-Easy, pop dots, sponge

Thanks for stopping by today!

Blessings!

Kathy
 

Thursday, November 21, 2013

Spellbinders Platinum Party Blog Hop - Heartfelt Creations


Happy Thursday everyone!

Welcome to the second day of the Spellbinders Platinum Party Blog Hop!!!  I'm so excited to be participating in the Hop today with Spellbinders for Heartfelt Creations!  I hope you are having fun hopping and enjoying all the beautiful creations on your way!

You can find all the rules for the contest at the Spellbinders Blog here and be sure to visit all the participating blogs to be eligible for the Grand Prize.

For your chance to win the Grand Prize for the Platinum Party please enter here

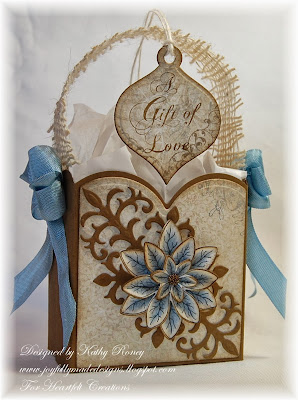
For my project, I will be showing you how I made this special Christmas gift bag using the Grand Labels 23 Die and lots of other Spellbinders and Heartfelt Creations products!


You can make this bag and decorate it for any occasion and it's pretty simple to put together!


I put together a little picture tutorial in a separate post to show you how I did it...sorry I don't have a video camera...yet!

To decorate my bag, I used Spellbinders Dies and  Heartfelt Creations designer papers, stamps, and dies.  I matted the front and back of the bag with light brown designer paper from the Christmas Card Paper Collection by cutting it with the same Labels 23 Grand die, scoring it in the same manner, and trimming the front and back pieces to fit.  I then inked them with Soft Suede Ink and glued them to the bag.

The poinsettia flower was made with the Christmas Poinsettia PreCut Set and the matching Sun Kissed Fleur Die.  The wonderful thing about these is you stamp the one image and cut it with one die and you get 10 different flowers and 2 leaves at once!  It's a huge time saver and I love having extra flowers leftover to use when ever I need them! 


For my flower here, I used Solar White Cardstock and Onyx Black Ink.  I colored 3 of the flowers with Periwinkle and Black Prismacolor Pencils using mineral spirits.  The flower was shaped using the Paper Blossoms Molding Mat and Tool Kit and glued together.  I then added Antique Copper Microbeads to the flower center.  I cut 2 of the flourishes from the Ornamental Add On Die with Soft Suede Cardstock, glued them tip to tip as shown, and popped the poinsettia flower on top.


For the back of the bag, I cut one of the other flourishes from the Ornamental Add On Die with Soft Suede Cardstock and one of each snowflake from the Banner & Tree Die with Natural White Cardstock and glued together as shown adding an adhesive pearl to the center.

I added a bow on each side of the bag made with Danish Blue Seam Binding and an adhesive pearl to the center.  The handle of the bag is a jute ribbon sample I received from Really Reasonable Ribbon that I thought looked kind of cute as a handle!


The gift tag was made with Spellbinders Holiday Tags Dies.  I stamped the sentiment from Heartfelt Creations' Love At Christmas PreCut Set on more of the light brown designer paper with Soft Suede.  This was cut out with the tag die, along with another cut from Soft Suede cardstock.  I glued these together, inked the edges, and added some twine for a tie.


Here is the complete list of participating blogs for the contest both yesterday and today:

  
November 20th

Linda Lucas  www.lovelylindascraftcentral.blogspot.com.au (for Tsukineko)
Angelica Turner  bellisimavida.blogspot.com/ (for Heartfelt Creations)
Mechele Rudd (The Stamp Doctor)http://thestampdoctor.blogspot.com


Allie Gower My Card Partyhttp://wp.me/p2Ys5f-Ai (for Want2Scrap)
Eva Dobilas http://evafromca.blogspot.com/(for JustRite)
Kathy Roneywww.joyfullymadedesigns.blogspot.com (for Heartfelt Creations) (that's me!)
Emily Lanhamhttp://createserendipity.blogspot.com (for Tsukineko)
Steph Ackermanhttp://stephaniescraps.blogspot.com (for The Stamp Doctor)

 
I hope you enjoyed my gift bag tutorial using Spellbinders and Heartfelt Creations beautiful products!

Thank you for stopping by and good luck with the contest!

Supplies:

HCPC 3557 Christmas Poinsettia PreCut Set
HCPC 3554 Love at Christmas PreCut Set
HCD 738 Ornamental Add On Die
HCD 739 Banner & Tree Die
HCD 734 Sun Kissed Fleur Die
HCDP1 236 Christmas Card Paper Collection
Spellbinders Holiday Tags Shapeabilities
Spellbinders Grand Calibur
McGill Paper Blossoms Tool Kit
McGill Paper Blossoms Molding Mat
Art Institute Glue - Dries Clear

Paper: Solar White, Natural White (Neenah), Soft Suede (Stampin' Up)
Inks: Onyx Black (VersaFine), Soft Suede (Stampin' Up)
Accessories: Spellbinders Grand Labels Twenty-Three , Antique Copper Microbeads, Adhesive Pearls (Recollections), Bow-Easy Tool, Danish Blue Seam Binding, 1.5" Jute Ribbon (Really Reasonable Ribbon), mineral spirits, pop dots, Prismacolor Pencils: Periwinkle, Black


I'm submitting this to the following challenges:

Word Art Wednesday Challenge # 107 - Anything Goes.
Addicted to Stamps & More Challenge #72 - Make Your Mark

Blessings!

Kathy

Gift Bag Tutorial

Hi there!

Here is the tutorial I did showing you how I made the gift bag for the Spellbinders Blog Hop using their Labels 23 Grand Die.


You can make this bag and decorate it for any occasion and it's pretty simple to put together!  I put together a little picture tutorial to show you how I did it...sorry I don't have a video camera...yet!

1. I started with the largest die from Labels 23 Grand Dies and cut it with Soft Suede Cardstock.


2. On the wrong side of the die cut, score edge to edge as follows: on the short side score down the outside scallop on each side, then on the long side score down either side of the center scallop.  Use picture as a guide.


3. On long side of die cut, cut score lines from outside to where the lines meet score lines from short side.


4. Score 2 corner flaps on one of the long sides 7/8" in from outside edge.


5. Turn die cut over and fold score lines, then snip off the outside corners of the 4 flaps (so they don't show when folded up)
.


6. Use Scor-tape to adhere folded flaps together.


7.Turn over to right side and add Scor-tape to the middle flaps.


8. Turn over and adhere to unfolded sides.  Add Scor-Tape to inside of folded sides.


9. Adhere to outside to complete bag.  The finished bag measures 3" x 1 3/4" and is 3" tall.


Here's a view of my project from above:


And a view of the back:


I hope you enjoyed my tutorial and have fun making these!

Blessings!

Kathy

Wednesday, November 20, 2013

Heartfelt Creations - Peace

Happy Wednesday everyone!

I have a Christmas card for you today with this beautiful "Peace" image from the Peaceful Night Set from Heartfelt Creations.


(Click on photo for a closer view)


I love this blue and brown color combo together for Christmas!  I stamped the image on Solar White and colored it with pencils and mineral spirits.  I love the little scene inside the "P"!   The scalloped circle behind the image and the blue mat are from the Christmas Card Paper Collection, so pretty, I love that blue paper!  The card base is Soft Suede that matches the designer papers really well.

Be sure to stop by the Heartfelt Creations Blog to see all the beautiful creations by the designer this week!  Also, you can see some sneak peaks of the new release coming out on Black Friday next week!

I'm submitting this to the following challenges:

Word Art Wednesday Challenge # 107 - Anything Goes.
Addicted to Stamps & More Challenge #72 - Make Your Mark

Thank you for stopping by to visit!

Blessings!

Kathy


Peace Card

Heartfelt Creations Products and Products Carried by HC:

HCPC 3553 - Peaceful Night PreCut Set
HCDP1 236 - Christmas Card Collection
Product ID: 452255 – Grand Calibur
Product ID: 368770 – Scor-Pal
Product ID: DDOTS - Double Dots
Product ID: 354806 - Standard Circles Small

Other Products Used: Paper: Solar White (Neenah), Soft Suede (SU); Ink: Onyx Black (VersaFine), Soft Suede (SU), Wheat (VersaMagic); Small Petite Scallops (Spellbinders), buttons, twine, trim (Jo-Anns), Leather Tan Seam Binding (Really Reasonable Ribbon), Bow-Easy, Antique Copper Microbeads (Recollections), sponge, Scor-tape, mineral spirits, Prismacolor Pencils: Cloud Blue.
, Perwinkle, Black, Kelp Green, Marine Green, Jasmine, Ginger Root, Chocolate, Light Umber

Card size for this project is 5 1/2" x 4 1/4" with Soft Suede Cardstock.  Cut mat from blue designer paper measuring 4 1/16" x 5 5/16", ink edges and glue to base.  Add trim across card with Scor-tape.  Stamp image on Solar White with Onyx Black and color with pencils.  Cut image out with circles die and ink with Wheat while still in die.  Cut light brown designer paper with scallop circles die and ink edges with Soft Suede.  Add image with pop dots and add to card with pop dots.  Add microbeads to flower center with glue.  Add snowflake buttons, bow, and button with twine.