Be Joyful

Rejoice in the Lord always. Again I will say, rejoice! Let your gentleness be known to all men. The Lord is at hand. Be anxious for nothing, but in EVERYTHING by prayer and supplication, with thanksgiving, let your requests be made known to God; and the PEACE OF GOD, which surpasses all understanding, will guard your hearts and minds through Christ Jesus. Philippians 4:4-7

These are verses I memorized years ago and they are written on my heart. There are times when I still need to remember not to be anxious, but I eventually listen to my heart saying these verses. I didn't really understand what the "peace of God" was until I experienced it. It's having peace inside you, even when you're going through heartbreaking situations and trials. It does "surpass ALL understanding" and you know it comes from GOD alone. Praise the Lord for His wonderful promises!


I love, love, love what I do. I am passionate about the things I create and the talents God has placed in me. I SO appreciate the time you take to look at my things and the comments you all leave me!

Blessings to you!

Kathy
Showing posts with label Gifts. Show all posts

Tuesday, February 27, 2024

Bee Happy One Sheet Wonder 6x6


Hello!

I made this Bee Happy 6x6 one sheet wonder set using Echo Park’s Bee Happy designer papers.  I love the cheery yellow and green on these papers and think it makes a nice gift set.

Here is the complete set with all the cards together.


I made the set using the 6x6 one sheet wonder instructions I did way back in 2013 that you can find here.  The post shows the cutting layout I made back then to cut the pieces for the cards.  Here is the layout I used, it’s a little blurry, but if you click the link for the post you can see it better.


Here are the individual cards:

Card #1


Card #2


Card #3


Card #4


Card #5


Card #6


Here is a picture of the Echo Park paper pack and the paper I used for the one sheet wonder.  These one sheet wonder sets work best on designer papers that have 3 plus colors and the print is fairly small so you can see the designs even with small pieces.


Hope you enjoy this one sheet wonder project and it gives you a little inspiration!

Here are the items I used:

Stamps: Sincere Salutations (Stampin Up)

Ink: Onyx Black (VersaFine)

Paper: Bee Happy (Echo Park), white (Georgia Pacific), Spanish Moss, Sunshine, Antique Gold 

Other Products: Wide Oval, Scalloped Oval punches, Square Lattice Embossing Folder (Stampin Up), white silk ribbon (May Arts), green buttons, Bow-Easy Tool, white floss

If you do use my design, would you please refer to my blog post.  I did a google search yesterday and was surprised that people were using the exact same layout and putting their name on it. :(

Thank you for looking!

Blessings!

Kathy


Wednesday, July 5, 2017

Italiana Riviera Tile Coasters


Happy Wednesday!

Hope everyone had a wonderful Forth of July yesterday! We had a great time with family and friends!

Today I have a simple gift you can make using tiles from the home improvement store and stamps and inks.


These are a set of four tiles that I simply tied ribbon around and added a tag for gift giving. Here you can see how the tile looks. I did each with the same image.


For the back of the tiles I used cork backing which you can see here.


I've made a bunch of these in the past for gifts and also made single tiles with gift packaging to sell at crafts fairs. You can see previous posts for these here and here.

I hope these give you a little inspiration for gift ideas. This image is perfect for giving to a friend for a house warming gift.

Be sure to visit the Heartfelt Creations' Blog to see all the beautiful creations by the designers this week.

I'm submitting this to the following challenge:

Word Art Wednesday #290-291 - Anything Goes

Thanks so much for stopping by to visit!

Blessings!

Kathy


Italiana Riviera Tile Coasters

Heartfelt Creations Products and Products Carried by HC:

HCDP1-259 - Italiaan Riviera Paper Collection
HCD1-745 - Luggage and Tags Die

Other Products: Ink: Staz-On Jet Black, Olive Green, Royal Purple, Saddle Brown; Accessories: purple sheer ribbon, natural twine, sand paper, 4 Tumbled Marble 4" x 4" Noce Tiles (Home Depot), make up applicators, cork Con-Tact self-adhesive, Staz-On cleaner, steel ruler, cutting mat, paper towels, craft knife

Instructions: Sand rough edges of tiles, clean off dust with water, wipe dry and let dry overnight. Stamp sentiment from Italiana Riviera Set on top of each tile and Italiana Grape Cluster image on bottom using Jet Black Staz-On Ink. (Note: Apply reinker to ink pad before stamping to make sure ink pad is very juicy when stamping.) Let tiles dry overnight or heat set well with a heat gun.

Using Staz-On inks and make-up applicators, dab colors on tiles to color images. I use paper towels to dab off excess ink before applying to tile and then go back and add more color to shadows. After coloring is completed, bake tiles at 300 degrees for 20 minutes. Let tiles cool.

Cut cork sheet into 3 5/8" squares using cutting mat, metal ruler and craft knife. Adhere cork squares to backs of tiles.

Create these in a group of 4 for gift giving. Cut a piece of sheer ribbon and tie the group of tiles together.

For the tag, die cut the pre-made label from the Italiana Riviera Paper Collection using the matching die from Luggage and Tags Die Set. Ink the edges of the tag with Saddle Brown Ink and tie to ribbon with twine.

Wednesday, April 27, 2016

Berry Sweet Basket


Happy Wednesday!

It's time for a little Heartfelt Creations inspiration! This week I have a cute basket made with the Berry Cafe Collection!


I wish pictures would do this justice! The contrast of the red and white with the designer papers is so beautiful in real life! If you click on the photo, you can get a closer view of the basket.

I've had this basket tutorial pinned for quite a while and have been wanting to try this out. I thought it would be perfect with the Berry Cafe Collection of berries and flowers.

Here's a slightly different view of the basket where you can see the inside a little bit.


The base of the basket is made with Ruby Slipper cardstock and decorated with white cardstock and the Berry Cafe Paper Collection. I love this little basket and it really wasn't too hard to put together once I figured out the measurements from metric. These would make really cute gift baskets, especially for Mother's Day coming up!

The tutorial I used can be found here on Wenche Wold's Blog. Thank you Wenche for sharing your tutorial!

Be sure to visit the Heartfelt Creations Blog to see all the beautiful creations by the designers this week!

I'm submitting this to the following challenges:

Word Art Wednesday #228-#229 - Anything Goes
Addicted to Stamps & More Challenge #191 - Anything Goes
Tuesday Throwdown #291 - Anything Goes

Thank you for stopping by to visit!

Blessings!

Kathy


Berry Sweet Basket

Heartfelt Creations Products and Products Carried by HC:

HCPC 3731 - Berry Blossoms Cling
HCD1-793 - Berry Blossoms Die
HCDP1-265 - Berry Cafe Paper Collection
368770 - Scor-Pal
Deluxe Flower Shaping Kit
159723 - Art Institute Glue - Dries Clear
Other products: Papers: Neenah Solar White, Recollections White, Bazzills Ruby Slipper; Inks: VersaFine Onyx Black, Shabby Shutters Distress; Accessories: Lace, red trim, 1/4" and 1/8" Scor-Tape, Arrow Border Punch (EK Success), ribbon, Scotch Mounting Tape, Bow-Easy Tool, water spritzer

Instructions: Basket measures 4" x 4" and is 8 1/2" high including handle. I used this http://wenchespapirverden.blogspot.com/2013/05/tutorial.html tutorial to make this basket. I converted the measurements from her metric ones to the following: cut Ruby Slipper 12" x 12", score at 4" and 8", turn and repeat scoring. Follow her instructions for cutting the flaps on each side.

Cut the large (12" x 12") designer paper sheet (pictured) as follows: 5 - 3 3/4" x 3 3/4" and 2 - 7/8" x 12". Cut the 2 small (6" x 6") designer paper sheets of the same design as follows: 12 - 7/8" x 4 1/8". Ink all edges of designer papers with Shabby Shutters.

Cut white cardstock as follows: 12 - 1 3/4" x 4 1/8" and 1 - 1 3/4" x 12". Punch all long edges of the white pieces with the edge punch on both sides. (Note: the width of these pieces will depend on the edge punch you use as stated in her tutorial. The punch I used needed to be 1 3/4" wide in order to be 1 1/4" wide after punching. You will need to test this out on scrap paper in order to get the fit you want for your edge punch.)

Glue the 5 designer paper squares to the inside of the basket leaving two top, center sides unglued to insert the handles in. Glue the white and designer paper strips together centering them.

Follow the tutorial instructions for adhering the short strips to the outside of the basket sides. Assemble the basket and adhere together using Scor-Tape. Finish adhering the strips on outside of basket per the tutorial. Add handle with Scor-Tape inserting in unglued space between the designer paper and basket side. Add lace and trim on top edge of basket using Scor-Tape. Cut Ruby Slipper cardstock 3/8" wide and add to bottom of basket using 1/8" Scor-Tape to give the basket a finished look on the bottom. Make 2 multi-loop bows with red gingham ribbon and add to base of handle on each side using glues dots.

Stamp Berry Blossom Cling on Solar White with Black Onyx stamping off the color on scrap paper first to get a softer shade of black. Select two small blooms, spritz lightly with water on backs and shape with Deluxe Flower Shaping Kit. Once dry, add Heart of Gold Prills to centers using Art Institute Glue. Glue to bow centers once dry using glue dots.

Thursday, October 22, 2015

Sweet Lullaby Brag Book


Hi there!

Today I have a "brag book" to show you that I made for one of my neighbors that recently had a baby.  These books are so easy to put together and make a nice gift.


To decorate the book I used Heartfelt Creations stamps, designer papers and dies from the Sweet Lullaby Collection. The baby shoe image was colored with pencils and mineral spirits and die cut with Decorative Labels 22 Die.

Here is the inside of the book which contains 8 - A2 clear envelopes that you can put pictures in. I also included a blank Labels 22 die cut that can be written on.


To package this up for gift giving, I used an 8 11/16" x 11 14/16" clear envelope and cut it down to fit. (I normally use a 6 1/8" x 8 1/2" clear seamed envelope, but I was all out.) I then created a "sticker" with a sentiment and my Create-A-Sticker Machine.


You can see full instructions for this at the end of my post. Hope you like my little brag book project and it inspire you!

I'm submitting this to the following challenge:

Word Art Wednesday Challenge #206

Thanks so much for stopping by to visit!

Blessings!

Kathy


Sweet Lullaby Brag Book

Heartfelt Creations Products and Products Carried by HC:

HCPC 3603 - Sweet Dreams Cling
HCPC 3605 - Sweet Lullaby Sentiments Cling
HCD 744 - Once Upon A Time Die
HCPC1 243 - Sweet Lullaby Paper Collection
368770 - Scor-Pal

159723 - Art Institute Glue - Dries Clear
Other products: Paper: Solar White (Neenah), yellow (DCWV), Baby Blue (Coredinations); Ink: Sea Breeze, Thatched Straw (VersaMagic), Onyx Black (VersaFine); Accessories: 8 - A2 clear bags, 1 - 8 11/16" x 11 15/16" clear bag, Buttercup Liquid Pearls (Ranger), heart shape button, Xyron Create-A-Sticker, Spellbinders Labels 22, Decorative Labels 22, Crop-A-Dile Tool, White Embossing Powder (Stampin Up), heat tool, yellow fibers, Bow-Easy Tool, Scor-Tape, Scotch Mounting Tape, glue dots, mineral spirits, paper stumps, Prismacolor Pencils: Kelp Green, Marine Green, Cloud Blue, Slate Blue, Indigo Blue, Jasmine, Sandbar Brown, Light Umber, Cool Greys 10, 30, 50%

Instructions: Brag book measures 4 3/4" x 7 1/4". Follow instructions for Clear Envelope Brag Book on Split Coast Stampers here. Use Baby Blue cardstock for back/spine and front of book. (I included 8 clear envelopes in this book.) Create mats for the front and inside of book by cutting Sweet Lullaby papers to fit, inking edges with Sea Breeze and gluing down. Die cut Labels 22 with yellow cardstock and glue to inside of book. Die cut Labels 22 with Baby Blue cardstock and adhere to front of book with Scotch Mounting Tape.

Stamp baby shoe image from Sweet Dreams Cling Set on Solar White with Onyx Black Ink. Color with pencils and mineral spirits using paper stumps. Die cut image with Decorative Labels 22 and add to front with Scotch Mounting Tape.

Use Crop-A-Dile Tool to punch 2 holes for binding as pictured, add fibers or ribbon and tie in a knot or bow. Make a small multi-loop bow with fibers and add to top right with glue dots. Add heart button to bow with glue dots. Add Buttercup Liquid Pearls to flower centers on image.

For gift packaging, I used an 8 11/16" x 11 15/16" clear bag and cut off the top extra. (Normally I use 6 1/8" x 8 1/2" clear bags for these, but I was all out and had to make do with a larger bag by cutting it down.) To close the bag I created a sentiment "sticker" by stamping the Sweet Lullaby Sentiments on yellow cardstock with VersaMark Ink, heat embossing with White Embossing Powder and die cutting with matching Once Upon a Time Die. Select the "Congratulations" sentiment and create a "sticker" by running it through the Xyron Create-A-Sticker Machine. Add to back of packaging to close.

Wednesday, September 2, 2015

Berry Sweet Raspberries Card and Gift Bag


Happy Wednesday!

I'm back with a cute card and gift bag using Heartfelt Creations' Farmers Market Collection!

I made the card clean and simple using a kraft pre-made card for the base. I stamped the sentiment directly on the base, then added one of the large raspberry swirls colored with pencils and mineral spirits. I love these stamped images with the matching die! So easy to work with! Then I added a bow and pearl to embellish it.


For the gift bag, I used a kraft pre-made bag and added some of the beautiful designer paper to cover the front of it. I then embellished it with some lace, trim, bows and a tag cut from the designer papers. A quick and easy gift presentation with a card to match!


Be sure to visit the HC Blog to see all the wonderful creations by the designers this week!

I'm submitting this to the following challenges:

Word Art Wednesday #199 - Anything Goes/Family Friendly

Thank you for stopping by!

Blessings!

Kathy


Sweet Raspberries

Heartfelt Creations Products and Products Carried by HC:

HCPC 3689 - Berries and Peaches Cling
HCD1-777 - Farmers Market Fruit Die
159723 - Art Institute Glue - Dries Clear
SMP001 - Stamp Mat Pad

Other products: Onyx Black Ink (VersaFine), Solar White cardstock (Neenah), Bow-Easy Tool, Burgundy Jute String (Really Reasonable Ribbon), adhesive pearl, Scotch Mounting Tape, glue dots, Recollection pre-made Kraft card (4" x 5 1/2"), bone folder, paper stumps, mineral spirits, Prismacolor Pencils: Kelp Green, Marine Green, Black, Dark Purple, Black Cherry, Black Raspberry

Instructions: Card measures 4" x 5 1/2". Stamp sentiment on lower right of card base using Onyx Black Ink. Fold pre-made card and use bone folder to sharpen crease. Stamp larger raspberry image on Solar White with Onyx Black Ink. Color with pencils and mineral spirits using paper stumps. Die cut image using matching die from the Farmers Market Fruit Die. Add pieces of Scotch Mounting Tape to back of berries and add glue on back of leaves and stems. Add to card base as pictured. Make multi-loop bow with Burgundy Jute String using Bow-Easy Tool and add using glue dots. Add adhesive pearl to bow center using glue dots.


Berry Sweet Gift Bag

Heartfelt Creations Products and Products Carried by HC:

HCDP1-257 - Farmers Market Paper Collection
HCD 745 - Luggage and Tags Die
159723 - Art Institute Glue - Dries Clear

Other products: Ink: Ranger Peeled Paint Distress, Quick Quotes Razzberry and Brandywine Chalk Inks; lace (my stash), Moss Twill, Burgundy Jute String, Bow-Easy Tool (Really Reasonable Ribbon), Olive Burlap String (May Arts), Celebrate It Small Kraft Bag (Michaels), Scor-Tape, Scotch Mounting Tape, glue dots, green button

Instructions: Bag measures 5 1/4" x 8 1/2" (excluding handles). Cut designer paper pictured to 5" x 8 1/4". Ink green edges with Peeled Paint and purple edges with Razzberry. Adhere to bag front using Scor-Tape. Add lace and Moss Twill as pictured using Scor-Tape. Die cut tag from paper collection using the matching die from Luggage and Tags Die. Ink edges with Razzberry and Brandywine Inks. Add tag using Scotch Mounting Tape and glue dots. Make multi-loop bow with Burgundy Jute String using Bow-Easy Tool and add to top of tag using glue dots. Thread Olive Burlap String into button and tie into a bow on back. Add to Burgundy gown using glue dots.


Wednesday, May 6, 2015

Teal Rose Fold Over Bookmark


Happy Wednesday!

I'm back today with a quick and easy gift you can create using Heartfelt Creations designer papers!


This is a Fold Over Bookmark that I found a tutorial for on Split Coast Stampers here. I made a bunch of these a couple of years ago for ladies in a Bible Study class I was in and they loved them! Very simple to make and you can decorate them any way you want! Perfect way to use up leftover pieces of designer papers too!

Make sure to visit the HC Blog to see the designers beautiful creations this week!

Next week is the release of the Cascading Fuchsia Collection! What a gorgeous collection it is! You can see a preview of it here.

I'm submitting this to the following challenge:

Word Art Wednesday Challenge #182 - Anything Goes

Thanks for stopping by to visit!

Blessings!

Kathy


Teal Rose Fold Over Bookmark

Heartfelt Creations Products and Products Carried by HC:

HCDP1-253 - Everyday Heroes Paper Collection
368770 - Scor-Pal
Art Institute Glue Clear

Other Products: Paper: Black (Recollections); Ink: Midnight Confession (Quick Quotes); Crop-A-Dile, Platinum Liquid Pearls (Ranger), Black and Soapstone Seam Binding, Black Burlap String (Really Reasonable Ribbon), Baja Breeze Seam Binding (Stampin Up), fibers (my stash), Scor-Tape 1/4", metal charm, pop dot, Aleenes Fast Grab Tacky Glue.

Instructions: Bookmark measures 2" x 5 1/2". Follow "Fold Over Bookmark" instructions here. Cut black card stock 2" x 11", score at 5 1/2" and fold crease. Adhere top 1/2" of bookmark by adding 2 pieces of Scor-Tape to inside top. Using the 12" x 12" piece of designer paper with the teal roses in each corner, cut 1 7/8" x 5 3/8" from one of the corners. Ink edges with black ink and glue to bookmark. Make hole in top of bookmark with Crop-A-Dile and add various ribbons and fibers tying in a knot. Add charm using Black Burlap String and tie into a bow. Add this to top of ribbon knots using Aleenes Fast Grab Tacky Glue. Add pop dot under charm to keep in place.

Wednesday, April 15, 2015

Yellow Daisies Gift Set - Heartfelt Creations


Happy Wednesday!

It's time for a little inspiration from Heartfelt Creations! This week I have a card and gift bag set using yellow daisies.


I used the Delightful Daisies Set and matching die for the flowers. They were stamped with VersaMark on Natural White card stock and embossed with Aged Ivory Embossing Enamel. I tried using the regular white card stock, but it was too bright. I like the way it came out on the Natural White much better even though I used white card stock for the rest.

The daisies and leaves were colored with Mango Madness and Tea Leaves chalk inks using make-up applicators. I used the Deluxe Flower Shaping Kit and a pencils to shape the flowers and leaves after spritzing the back with water. Once the flowers are dry, they retain their shape really well.

The sentiment on the card is from the Heartfelt Expressions Set. I used a thank you sentiment, but this would be great for a birthday or Mother's Day too.

Here's a separate picture of the card.


Here's a picture of the mini gift bag. I used a pre-made gift bag and decorated the front of it to match the card.


Here's a little close-up of the flowers on the card.


Be sure to visit the HC Blog to see all the beautiful creations by the designers this week! There are some fun projects there using the Everyday Hero Collection!

I'm submitting this to the following challenges:

Word Art Wednesday Challenge #179 - Anything Goes

Thanks for stopping by to visit! I hope this gives you a little inspiration!

Blessings!

Kathy


Yellow Daisy Thank You

Heartfelt Creations Products and Products Carried by HC:

HCPC 3656 - Delightful Daisies Cling
HCPC 3474 - Heartfelt Expressions Cling
HCD 760 - Delightful Daisy Die
368770 - Scor-Pal
Deluxe Flower Shaping Kit
159723 - Art Institute Glue - Dries Clear


Other Products: Paper: White (Recollections), Natural White (Neenah), yellow (DCWV Stack); Ink: VersaMark, Mango Madness, Tea Leaves (VersaMagic), Onyx Black (VersaFine); Accessories: Elegant Ovals (Spellbinders), Ditsy Dots Embossing Corner Folder (Tattered Lace), Bow-Easy Tool, heat tool, Aged Ivory Embossing Enamel (Stampendous), yellow sheer ribbon, adhesive pearl, water mister, glue dots, Scotch mounting tape, tape, make-up applicators, pencil.

Instructions: Card measures 4 1/4" x 5 1/2" made with white card stock. Cut yellow card stock mat measuring 4 1/16" x 5 5/16". Cut white mat measuring 3 7/8" x 5 1/8". Emboss white mat with Ditsy Dots Corner Embossing Folder on the top left and again on the bottom right. Wrap two pieces of yellow ribbon across mat at an angle between the embossed areas and secure in back with tape. Glue two mats together and add to card base with mounting tape. Stamp sentiment on white card stock with Onxy Black Ink and die cut with second largest Elegant Ovals Die. Add to card as pictured with Mounting Tape.

Stamp Delightful Daisy flowers and leaves (2 small and 1 large) on Natural White with VersaMark and heat emboss with Aged Ivory Embossing Enamel heating from underneath. Color 3 different size small flowers with Mango Madness Ink using make-up applicators, fading color out to petal tips. Die cut flowers with Delightful Daisy Die and clip between petals. Mist back of flowers with water and shape with Deluxe Flower Shaping Kit and use a pencil to roll the petals as pictured. Once dry, add Lemon Chiffon Prills to flower centers using Art Institute Glue (AIG). Color leaves with Tea Leaves Ink using make-up applicators and cut with matching die. Mist back of leaves with water and shape with Deluxe Flower Shaping Kit and fingers. Once leaves and flowers are dry, add to card arranging as pictured using AIG. Make multi-loop bow with yellow ribbon using Bow-Easy Tool and adhere with glue dots. Add adhesive pearl to bow center using glue dots.


Yellow Daisy Mini Gift Bag

Heartfelt Creations Products and Products Carried by HC:


Other Products: Paper: White (Recollections), Natural White (Neenah), yellow (DCWV Stack); Ink: VersaMark, Mango Madness, Tea Leaves (VersaMagic); Accessories: White Mini Craft Bag 4" x 3" (The Paper Studio), Perfect Polka Dots Embossing Folder (Stampin Up), Bow-Easy Tool, heat tool, Aged Ivory Embossing Enamel (Stampendous), yellow sheer ribbon, adhesive pearl, water mister, glue dots, Scotch mounting tape, tape, make-up applicators, pencil.

Instructions: Gift bag measures 4" x 3" plus handle. Cut yellow mat measuring 3 13/16" x 2 13/16". Cut white mat measuring 3 5/8" x 2 5/8" and emboss with Perfect Polka Dots Embossing Folder. Glue mats together and add to bag front with Mounting Tape.

Stamp Delightful Daisy flowers and leaves (2 small and 1 large) on Natural White with VersaMark and heat emboss with Aged Ivory Embossing Enamel heating from underneath. Color 3 different size small flowers with Mango Madness Ink using make-up applicators, fading color out to petal tips. Die cut flowers with Delightful Daisy Die and clip between petals. Mist back of flowers with water and shape with Deluxe Flower Shaping Kit and use a pencil to roll the petals as pictured. Once dry, add Lemon Chiffon Prills to flower centers using Art Institute Glue (AIG). Color leaves with Tea Leaves Ink using make-up applicators and cut with matching die. Mist back of leaves with water and shape with Deluxe Flower Shaping Kit and fingers. Once leaves and flowers are dry, add to card arranging as pictured using AIG. Make multi-loop bow with yellow ribbon using Bow-Easy Tool and adhere as pictured with glue dots. Add adhesive pearl to bow center using glue dots.


Wednesday, January 14, 2015

Birds and Blooms Inspirational Frame


Happy Wednesday!

It's time for the release of the Birds and Blooms Collection!!!

Does Old Man Winter have you firmly in his grip?  Chase the winter blues away with a breath of springtime!  Heartfelt Creations is pleased to present the "Birds and Blooms" collection:  a virtual spring garden that's lovely as a song! Shades of cherry blossom pink, robin's egg blue, and soft leafy green fill sunny garden scenes featuring bluebirds, blooming branches, picket fences, bird baths, bird houses, butterflies and frilly hydrangeas.  Dozens of stunning card fronts, pre-designed layouts, borders, sentiments and artwork are the perfect remedy for mid-winter doldrums. Six hand-drawn stamp sets feature blossom laden branches, nesting birds, garden scenes and an elegant collage.  Two sets of dies coordinate with papers and stamps allowing you to add realistic blossoms, branches and birds to your artwork.  Take a well-deserved break from the bleak landscape of winter and escape to a colorful springtime garden where birds chirp, flowers bloom, and soft breezes lift your spirit and inspire your creativity!

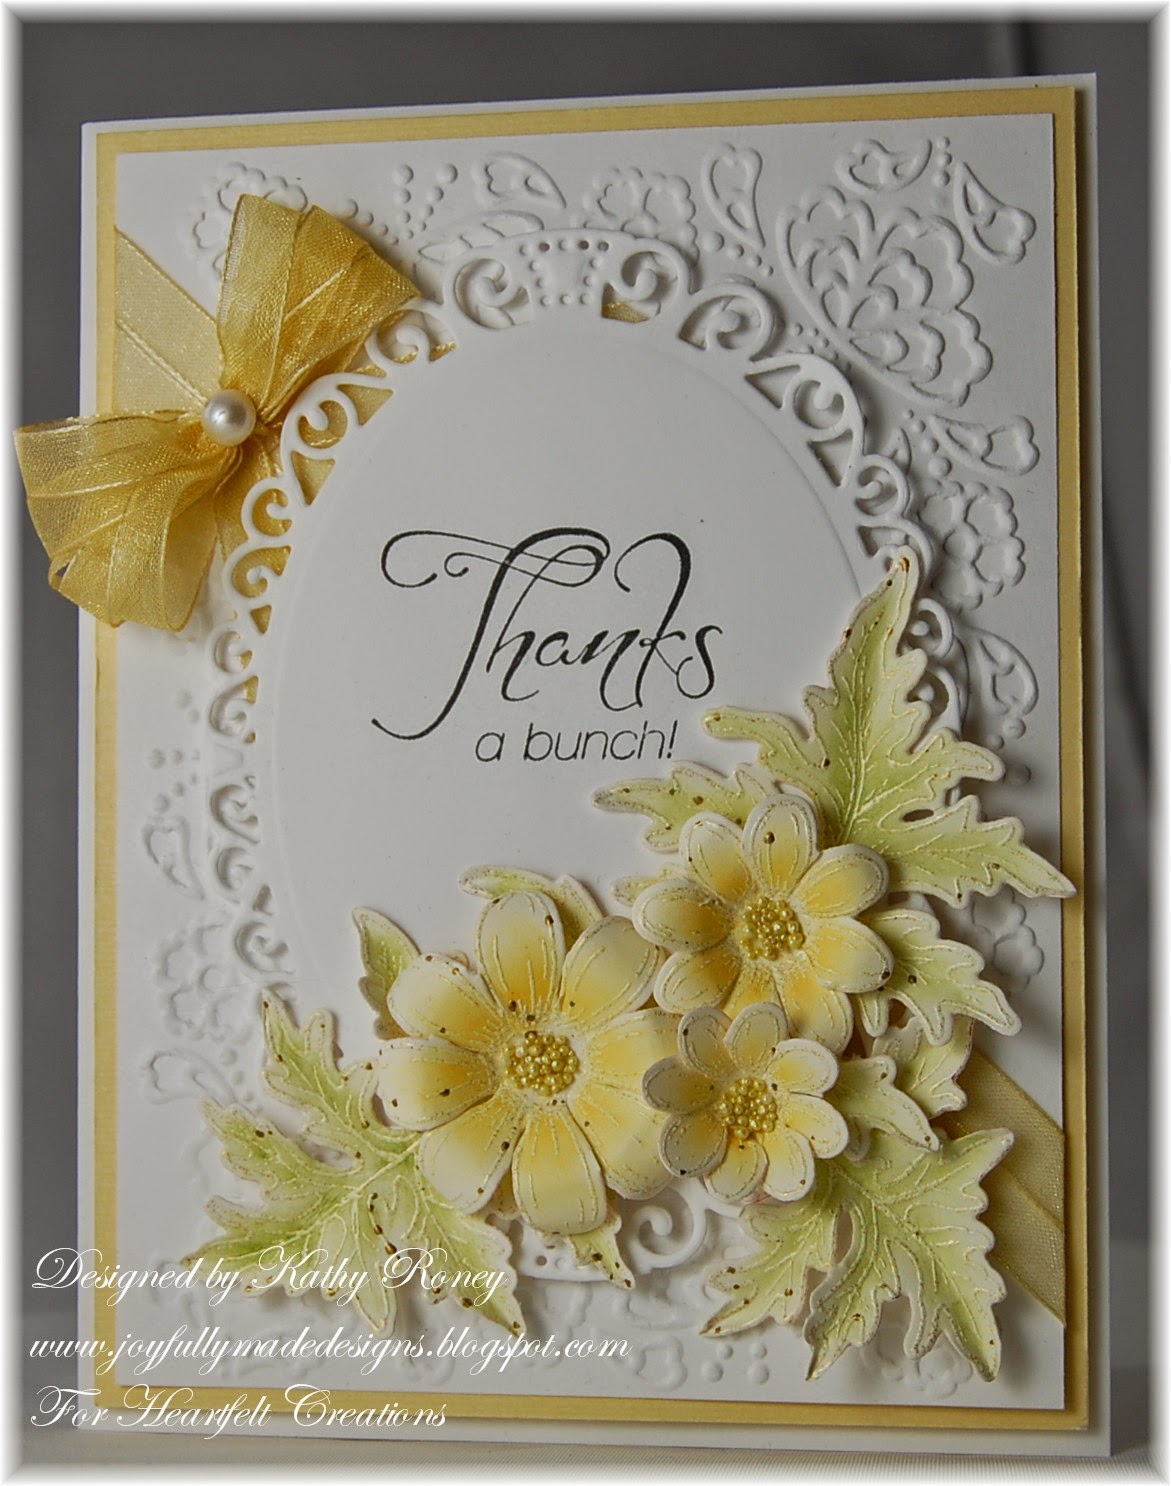
For my project this week, I embellished a chipboard decor frame.


(Click on photo for a closer view)


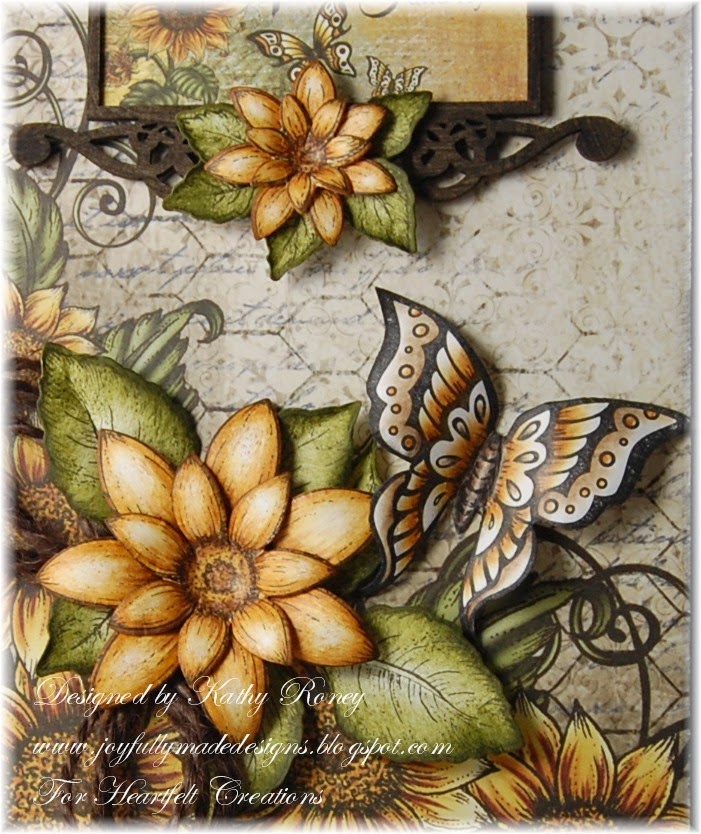
Here are some close ups of the flowers, birds and butterfly.


Be sure to visit the HC Blog to see all the beautiful creations by the designers this week!  Lots of beautiful projects there to inspire you!

I'm submitting this to the following challenge:

Word Art Wednesday Challenge #166 - Anything Goes

Thanks for stopping by today!

Blessings!

Kathy


Birds and Blooms Inspirational Frame

Heartfelt Creations Products and Products Carried by HC:

HCPC 3644 - Birds and Blooms Cling Stamp Set
HCPC 3645 - Leafy Branch Cling Stamp Set
HCPC 3649 - Birds and Blooms Collage Cling Stamp Set
HCDP1 - 250 - Birds and Blooms Paper Collection
HCD 756 - Birds and Blooms Die
HCD 757 - Leafy Branch Die
HCD 750 - Cut Mat Create 1B Die
368770 - Scor-Pal
459222 - McGill Paper Blossoms Tool Kit
159223 - McGill Paper Blossoms Molding Mat
Memento Rich Cocoa Ink

Other Products:

Paper: Recollections White, Kraft, Neenah Solar White
Ink: VersaMark, Ranger Peeled Paint, Forest Moss, Victorian Velvet Distress, Quick Quotes Java, Razz-Berry
Accessories: Chip Decor Frame 4" x 6" opening (The Paper Studio), Pink Jute String, Bow-Easy Tool (Really Reasonable Ribbon), fibers (stash), green twine, 1/8" green ribbon (Michaels), pink trim (Jo-Anns), Bird Cage, Flourish Set 15 9 (Creative Embellishments), printer for text, cutting mat, craft knife, glue gun, splat mat (Bazzills), Scor-Tape, Detailed Clear Embossing Powder (Stampendous), Clear Bark Embossing Powder (Recollections), heat tool, Mod Podge, foam brush, sand paper, sponge, makeup applicators, mini mister with water, Buttercup Liquid Pearls (Ranger), Grand Calibur, mineral spirits, Prismacolor Pencils: Sand, Jasmine, Goldenrod, Espresso, Pink Rose, Magenta, Mahogany Red, Blue Slate, Blue Lake, Blue Violet Lake, Periwinkle, Black.

Instructions: Project measures 9" x 11" with a 4" x 6" opening. Prepare frame by covering with designer paper using Mod Podge and brush. (I used the paper with the flowers on top and stripes on the bottom cutting away the strip of flowers going across.) Once dry, used cutting mat and craft knife to trim off excess paper from opening and outside of frame. Trim the small 1/2" floral strip from the designer paper and trim to fit where to the two papers meet to cover the seam. Glue down and trim any excess from the edges. Lightly sand all edges and ink with Victorian Velvet Ink using sponge. Adhere 1/8" green ribbon to inside opening edge using Scor-tape. Adhere pink trim to outside edge of frame using Scor-tape. Add flourish and bird cage pieces to frame as shown using Art Institute Glue trimming pieces to fit if needed.

Stamp flowers from Birds and Blooms Set on Solar White with Victorian Velvet. (I used a total of 32 flowers.) Clip between petals with scissors and ink edges with Razz-Berry Chalk Ink using makeup applicators. Lightly spritz back of flowers with water and shape using mat and tool kit by rolling/pressing each petal on back, then turn flower over and press down the center to lift petals. Let flowers dry.

Stamp leaves from Leafy Branch Set on Solar White with Peeled Paint Ink. I used 4 (5-leaf), 6 (3-leaf), and 6 (2-leaf). Ink edges with Peeled Paint and little Forest Moss Ink. Shape leaves by slightly pinching with fingers. Stamp leaf and floral branch from Birds and Blooms Set on Solar White with Peeled Paint and color leaves only in same manner as other leaves. On kraft paper using VersaMark Ink, stamp 2 long branches, 1 shorter branch from Leafy Branch Set and leaf and floral branch from Birds and Blooms Set, then heat emboss with Clear Bark Embossing Powder. Color branches with Rich Cocoa and Java Inks using sponges. To assemble the leaf and floral branch, I trimmed off the flowers and leaves from the kraft paper branch, then glued the Peeled Paint leaves (done with the same image) onto the branch. Add the flowers to the branch. Add leaves and flowers to the other 3 branches. Add Lemon Chiffon Prills to the flower centers using Art Institute Glue.

Add branches to frame using glue gun. The leaf and floral branch is on the right side over the flourish and bird cage. On the left side of the frame, the shorter branch is on top of the flourish (above the bow) and the other 2 branches are arranged on the bottom corner towards the center. Glue down branches with glue gun. Make large bow with Bow-Easy Tool using multiple fibers together (I used 4 different ones) and glue in place with glue gun.

Stamp birds from Birds and Blooms Set on Solar White with Onyx Black Ink and die cut with matching Birds and Blooms Die. Color 2 birds with pencils and mineral spirits. Stamp butterfly only from Birds and Blooms Collage Set on Solar White with Onyx Black Ink, color with pencils and mineral spirits, then fussy cut. Add Buttercup Liquid Pearls to dots on the butterfly and let dry. Add birds as shown using pop dots. Add butterfly using Art Institute Glue.

For the inside of the frame, I created text on a computer, printed it on white card stock, then trimmed it to fit inside the frame. (This would work well with a photo also.) Create a mat/frame for the text by cutting the blank card front from the designer paper and die cutting the center using the large rounded rectangle die from the Cut Mat Create 1B Die. Ink edges with Peeled Paint, glue this over the text and add to the frame.

Wednesday, November 12, 2014

Pink Poinsettia Ornament - Heartfelt Creations


Happy Wednesday!

It's time for a little inspiration from Heartfelt Creations!  This week I have a little Christmas ornament to show you!


In real life this is actually really pretty!  It's one of those projects that is just plain difficult to photo!  If you click on the photo itself, you can get a better view of it if you like.

The base of the ornament is made using the Raindrops on Roses Die. The flower is the Christmas Poinsettia done with white card stock, heat embossed with white powder and colored with chalk ink.  The full instructions are at the bottom of my post if you would like to try it out for Christmas gifts this year!

Be sure to visit the HC Blog to see all the beautiful creations by the designers this week!  There's also a sneak peek of the collection being released on Black Friday!

I'm submitting this to the following challenges:

Word Art Wednesday Challenge #158 - Anything Goes

Thanks for stopping by to visit!

Blessings!

Kathy


Pink Poinsettia Ornament

Heartfelt Creations Products and Products Carried by HC:

HCPC 3557 - Christmas Poinsettia PreCut Set
HCD 734 - Sun Kissed Fleur Die
HCD 743 - Raindrops on Roses Die
452255 - Grand Calibur
368770 - Scor-Pal
459222 - McGill Paper Blossoms Tool Kit
159223 - McGill Paper Blossoms Molding Mat
159723 - Art Institute Glue - Dries Clear
SMP001 - Stamp Mat Pad
Metal Glue Tip
359848 - Spellbinders Tool N' One

Other Products:

Paper: Solar White (Neenah)
Ink: VersaMark Watermark, Perfect Plumeria (VersaMagic)
Accessories: make-up applicator, 1/8" Scor-tape, metal charm, bead, spacer, 1/8" pink ribbon (Offray), White Seam Binding, Pearlized String Beads, Bow-Easy Tool (Really Reasonable Ribbon), Diamond Stickles (Ranger), glue gun, Bazzills Splat Mat, White Embossing Powder (Stampin Up), orange stick, adhesive pearls (Recollections), heat tool.

Instructions:

Using white card stock and the Raindrops on Roses Die, die cut 6 Lattice Pieces. Score each piece down center point to point of longer side and crease. Glue half piece at a time with another half using the glue and metal glue tip leaving last 2 side open. (Follow the same technique Emma Lou used in making the dimensional tree card here.) Cut a 16" piece of 1/8" pink ribbon. Thread ribbon through charm and then the bead spacer. Add strip of Scor-Tape down center of ornament where all the scored pieces meet. Lay the ribbon inside onto Scor-Tape to secure in place. Glue last two side together to form ornament. Cut approximately 10" piece of Pearlized String Beads, make loop and glue to top of ornament with glue gun. Make 5 loop bow with White Seam Binding and bow tool. Glue over beads where they cross each other using glue gun.

Stamp Christmas Poinsettia image on Solar White with VersaMark Ink and heat emboss with White Embossing Powder. Die cut with Sun Kissed Fluer Die. Select 3 flowers (I used the 2nd, 4th, and 6th largest blooms) and color with Perfect Plumeria Ink and make up applicator. I shaped the flowers using the mat and pressing the end of an orange stick down the center of each petal and then using the Paper Blossoms tools to press in the center. Glue flowers together, offsetting petals, using Art Institute Glue. Add adhesive pearl to flower center and outline pearl with Diamond Stickles. Add flower to bow center using glue gun. Tie knot on top of pink ribbon for hanging ornament. Thread ribbon through metal bead and glue over knot to cover it.

Wednesday, October 22, 2014

Blue Sunflowers Card & Note Holder - Heartfelt Creations


Good morning!

It's Wednesday again and time for some Heartfelt Creations inspiration!  This week I have a card and Post-It note & pen holder set to show you using the Classic Sunflower Collection.  I just LOVE this collection!!!


To color these I used a technique I found here called Highlight Emboss Resist by Kelly Acheson.  It's similar to a technique I already do with chalk inks on my flowers, but with this technique you highlight the image for a background.  Pairing the technique together with the sponged flowers is a beautiful combination!

Here is the card by itself.


And a little closeup of the flower and the technique used.  I used VersaMark Watermark Ink and detail clear embossing powder for the images and then colored with Nautical Blue Ink using a sponge.  I love the monotone color and this beautiful shade of blue with the white.  I added extra sponging where shadows might appear to give it a little depth.


Here's the post-it note holder and pen set.


And a side view for you.


These are so simple to make and make really cute gifts when packaged up!  I made a bunch of these for craft shows and gifts in the past.  I think I may make some of these for Christmas gifts this year!  Using this coloring technique will make them quick and easy to color too!

Be sure to visit the Heartfelt Creations Blog to see all the beautiful creations by the designers this week!

I'm submitting this to the following challenges:

Word Art Wednesday Challenge #155 - Anything Goes

Thanks for stopping by today!

Blessings!

Kathy


Sunflowers In Blue Card

Heartfelt Creations Products and Products Carried by HC:

HCPC 3626 - Classic Sunflower PreCut Set
HCPC 3627 - Sunflower Stem PreCut Set
HCPC 3628 - Sunflower Bouquet PreCut Set
HCPC 3545 - Open Leaf PreCut Set
HCD 753 - Classic Sunflower Die
HCD2 750 - Cut Mat Create 1B Die
HCD2 751 - Cut Mat Create 2A Die
HCD 736 - Class Leaf Die
452255 - Grand Calibur
368770 - Scor-Pal
459222 - McGill Paper Blossoms Tool Kit
159223 - McGill Paper Blossoms Molding Mat
Other Products: Paper: Solar White (Neenah), blue (Recollections); Ink: Nautical Blue (Memento), VersaMark Watermark; Accessories: Heat Tool, sponge, blue fibers, orange stick, Detail Clear Embossing Powder (Stampendous), pop dots, Fast Grab Tacky Glue (Aleene's).

Instructions: Make top folded card base with blue card stock measuring 4 1/4" x 5 1/2". Cut blue mat measuring 4 1/16" x 5 5/16". Cut Solar White 3 7/8" x 5 1/8". With VersaMark Ink, stamp corner treatment (Sunflower Stem Set) on bottom left and partial sunflower (Sunflower Stem) on top right, then heat emboss with clear embossing powder. Stamp sentiment as pictured with Nautical Blue Ink. Using a sponge and Nautical Blue Ink, add color to image using the Highlighted Emboss Resist Technique found here. Glue image to blue mat, wrap fibers across as shown 3 times securing in back, then add to card base with pop dots. With blue card stock, die cut 2 small vines from Cut Mat Create 1B Die and 1 small leaf from Cut Mat Create 2A Die.

Stamp Classic Sunflower and Open Leaf (8-leaf stem) images on Solar White with VersaMark and heat emboss with clear embossing powder. Die cut with Classic Sunflower Die. Select 2 medium flowers and sponge with Nautical Blue Ink. Ink leaf stem and pinch leaves. Shape flowers with orange stick and mat and tool kit as desired and glue together. Pinch leaves on blue vines with fingers. Arrange all as pictured cutting the leaves in pieces and glue down using Art Institute Glue.


Sunflowers In Blue Post-It Note & Pen Holder

Heartfelt Creations Products and Products Carried by HC:

HCPC 3626 - Classic Sunflower PreCut Set
HCPC 3628 - Sunflower Bouquet PreCut Set
HCPC 3554 - Love At Christmas PreCut Set
HCD 753 - Classic Sunflower Die
HCD2 750 - Cut Mat Create 1B Die
452255 - Grand Calibur
368770 - Scor-Pal
459222 - McGill Paper Blossoms Tool Kit
159223 - McGill Paper Blossoms Molding Mat

Other Products: Paper: Solar White (Neenah), blue (Recollections); Ink: Nautical Blue (Memento), VersaMark Watermark; Accessories: Heat Tool, sponge, orange stick, Detail Clear Embossing Powder (Stampendous), Post-It Note Pad, Scor-Tape, Gel Mini Pen (office supply store).

Instructions: With blue card stock, make Post-It note and pen holder base using technique found here.

To decorate, cut white card stock measuring 2 7/8" x 3". Stamp sentiment on top right with Nautical Blue Ink. Stamp corner treatment from Sunflower Bouquet Set on lower left with VersaMark and heat emboss with Detail Clear Embossing Powder. Use Highlighted Emboss Resist Technique found here to color the image using Nautical Blue Ink and sponge. Stamp Classic Sunflower image in same manner, select 3 small flowers and sponge with Nautical Blue. Shape flower with orange stick (or pen) and mat and tool kit. Pinch leaves on blue vines with fingers. Arrange all as pictured and glue down with Art Institute Glue.

Wednesday, September 24, 2014

Classic Sunflower Notepad - Heartfelt Creations


Happy Wednesday!

It's inspiration time from Heartfelt Creations!  Today we are doing a blog hop with Creative Embellishments so you will see lots of inspiration from designers using their beautiful products.  To see the beautiful inspiration from Creative Embellishments, click here.

My project today is a covered junior notepad.


(You can click on the photo for a better view.)


Here's a look at the inside.


Here's a little close up of the beautiful flowers and butterfly on the cover.


I love making these notepads, they make beautiful gifts with a matching card.  I used the Junior Legal Pad Wish List tutorial from Split Coast Stampers here, adjusting the measurements for a full size pad.  I've included the adjusted measurements in the instructions at the bottom of my post.

I used the Classic Sunflower designer papers to embellish the pad cover and pad topper.  The frame on the cover is from Creative Embellishments' Mini Ornate Frames set that I painted with black acrylic paint and added a piece of designer paper to the back of it.  I embellished the cover with flowers, leaves and a butterfly from the Classic Sunflower Collection.  The flowers and butterfly were colored with pencils and mineral spirits and the leaves were inked with Forest Moss Distress Ink.

Be sure to visit the HC Blog to see the beautiful creations by the designers this week!  Emma Lou also has a new video showing you a fun coloring technique and a sneak peek of the All Geared Up Collection being released October 8th!

I'm submitting this to the following challenge:

Word Art Wednesday Challenge #151 - Anything Goes

Thanks for stopping by to visit!

Blessings!

Kathy


Classic Sunflower Notepad

Heartfelt Creations Products and Products Carried by HC:

HCPC 3630 - Summer's Day PreCut Set
HCPC 3626 - Classic Sunflower PreCut Set
HCPC 3545 - Open Leaf PreCut Set
HCD 753 - Classic Sunflower Die
HCD 736 - Classic Leaf Die
HCDP1 - 247 - Classic Sunflower Paper Collection
452255 - Grand Calibur
368770 - Scor-Pal
459222 - McGill Paper Blossoms Tool Kit
159223 - McGill Paper Blossoms Molding Mat
SMP001 - Stamp Mat Pad
Metal Glue Tip

Other Products:

Paper: Solar White (Neenah), Black (Recollections), More Mustard (SU)
Ink: Onyx Black (VersaFine), Forest Moss, Vintage Photo Distress (Ranger)
Accessories: Black acrylic paint dauber (Ranger), Mini Ornate Frames (Creative Embellishments), Dark Brown Jute String (Really Reasonable Ribbon), Scor-tape, sponges, bow maker tool, craft knife, cutting mat, pop dots, Fast Grab Tacky Glue (Aleenes), Junior Size Writing Pad (office supply store), mineral spirits, Prismacolor pencils: Black, Yellow Ochre, Goldenrod, Burnt Ochre, Chocolate, Ginger Root, Sandbar Brown.

Instructions: Use tutorial from Split Coast Stampers for Junior Notepad found here using adjusted measurements as noted. Base: Cut More Mustard 10 1/2” x 8 1/4”, score at 5 1/8” and 5 3/8”.  Pad Topper: Cut designer paper 4 7/8” x 2 1/8” and score at 7/8” and 1 1/8”.  Add to pad top with double-sided tape following the tutorial.  Add pad to inside of base with double-sided tape following the tutorial.  Mat for inside: Cut designer paper 8” x 4 7/8”, ink edges with Forest Moss, and glue to base.  Mat for front: Cut Black mat 4 15/16" x 8 1/16" and glue to base.  Cut designer paper piece shown for front cover measuring 4 3/4" x 7 7/8", ink edges with Black Ink, glue to black mat and glue both to front cover.

Paint Mini Ornate Frame with black acrylic paint and let dry. Select image from designer paper tag assortment sheet, trim to fit behind frame, glue with Art Institute Glue and Metal Glue Tip. Trim any excess with craft knife and cutting mat. Add to notepad cover as pictured using pop dots.

On Solar White with Onyx Black, stamp Classic Sunflower, butterfly from Summers Day Set, 2 of 3-leaf stems, 1 of 9-leaf stems from Open Leaf Set. Color flowers and butterfly with pencils and mineral spirits. Fussy cut butterfly and shape as desired. Die cut flowers with Classic Sunflower Die, shape with mat and tool kit, glue together to form a small flower and a larger one. Die cut leaves with Classic Leaf Die, ink with Forest Moss Ink using sponge and shape with mat and tool kit. Make large 3-loop bow with Jute String and add to cover using Fast-Grab Glue. Arrange flowers, leaves (small leaves are cut into pieces) and butterfly as shown and glue all down.


Wednesday, September 3, 2014

Majestic Blooms Box - Heartfelt Creations


Happy Wednesday!

It's time for a little inspiration from Heartfelt Creations!  Today I have a pre-made gift box I bought at Michaels that I decorated with designer papers from the Raindrops on Roses Collection, Majestic Morning flowers and Burst of Spender leaves!


Here's a better view of the top with the beautiful flowers!


Here's a peek at the inside which I also covered with the designer papers.


Be sure to visit the HC Blog to see all the beautiful creations by the designers this week!  There is also a sneak peek of the new Sunflower Collection coming out September 10th!  Heartfelt Creations has also announced the list of Semifinalists for the design team!!!  Congratulations to all the Semifinalists!  Make sure to vote for your favorite top 5 and be eligible to win a gift certificate!

I'm submitting this to the following challenges:

Word Art Wednesday Challenge #148 - Anything Goes

Thanks for visiting today!

Blessings!

Kathy


Majestic Blooms Box

Heartfelt Creations Products and Products Carried by HC:

HCPC 3578 - Majestic Morning Background PreCut Set
HCPC 3546 - Classic Leaf PreCut Set
HCD 742 - Majestic Blooms Die
HCD 736 - Classic Leaf Die
HCD 743 - Raindrops on Roses Die
HCDP1 240 - Raindrops on Roses Paper Collection
452255 - Grand Calibur
459222 - McGill Paper Blossoms Tool Kit
159223 - McGill Paper Blossoms Molding Mat
Other Products:

Paper: Solar White (Neenah)
Ink: Onyx Black (VersaFine), Peeled Paint Distress (Ranger)
Accessories: Sparkle Sheer Shimmer Spritz (Tsukineko), glue gun, splat mat (Darice), Mod Podge, White 1/4" Silk Ribbon (May Arts), Bow-Easy Tool, 1/5" White Netting, String Beads Pearlized (Really Reasonable Ribbon), adhesive pearls, Diamond Stickles (Ranger), 3.75" White Gift Box (Michaels), mineral spirits, Prismacolor Pencils: Clay Rose, Rosy Beige, Black Cherry.

Instructions: Measure your pre-made box and trim the designer papers to fit each side of the box and lid both inside and out. For my box, I used the 12" x 12" sheet with roses in each of the 4 corners. I trimmed each corner, inked the edges with Peeled Paint Ink and glued to the box using Mod Podge. Use coordinating papers for the box inside, lid inside and sides using same process. For the top of the lid, I used the card front in the designer paper that matches the 12" x 12" image in a smaller version (3 5/8" square) and added it using same process. Die cut the Raindrops on Roses Die lattice piece with white card stock and glue to the lid top.

Stamp the Majestic Morning Background on Solar White with Onyx Black and color with pencils and mineral spirits. I used 9 of the 12 flowers for mine (2 of the smallest and 1 each of the next 7 sizes) to create 3 separate flowers in different sizes. Use the mat and tool kit to shape the flowers and glue them together using a glue gun for extra hold. Stamp 2 of the Classic Leaf open stems on Solar White using Onyx Black, die cut with Class Leaf Die and ink with Peeled Paint. Shape and pinch leaves with your fingers. Add stems and flowers to lid as pictured using glue gun. Add string beads, netting piece (tie across middle with string to form a fake bow) and a multi-loop bow using glue gun. Add adhesive pearls, stickles as desired. Spray with Sparkle Shimmer Spritz as desired.

Wednesday, July 23, 2014

Friends Frame - Heartfelt Creations


Happy Wednesday!

It's time for a little inspiration from Heartfelt Creations!  This week I have a little frame I bought at Michaels that I decorated and inserted with a sentiment and flowers.


For the inside, I stamped the flowers and “friends” sentiment together so they would fit nicely inside the frame.  I then colored the flowers with pencils and mineral spirits and dotted them with White Opal Liquid Pearls.

For the outside, I stamped some Posy Patch Flowers, colored them the same way, shaped them and added them to the frame with some of the beautiful new leaf and vines from the Cut Mat Create Dies.  I used a glue gun to adhere everything to make sure it stayed well.  I then added some Prills to the flower centers, a fiber bow and a button.

I think this makes a really sweet gift for a friend!  I've been collecting these frames from Michaels and have finally found a great use for them!  These would be cute gifts for Christmas or teacher gifts with a different sentiment!

Be sure to visit the HC Blog to see all the beautiful creations by the designers this week!  So much beautiful work there!

I'm submitting this to the following challenge:

Word Art Wednesday Challenge #142 - Anything Goes

Thank you for stopping by today!

Blessings!

Kathy


Friends Frame

Heartfelt Creations Products and Products Carried by HC:

HCPC 3618 - Everyday Blooms PreCut Set
HCPC 3616 - Vines and Blooms PreCut Set
HCPC 3303 - Posy Patch Flowers PreCut Set
HCD 750 - Cut Mat Create Set 1 B
HCD 751 - Cut Mat Create Set 2 A
452255 - Grand Calibur
368770 - Scor-Pal
SMP001 - Stamp Mat Pad
Spring Bling Prills
159723 - Art Institute Glue - Dries Clear
Paper Blossoms Tool Kit
Paper Blossoms Molding Mat

Other Products:
Paper: Solar White (Neenah), Green Linen (Recollections)
Ink: Onyx Black (VersaFine)
Accessories: Bow-Easy Tool (Really Reasonable Ribbon), Ivory Burlap String (May Arts), button, glue gun, White Opal Liquid Pearls (Ranger), 2.2" x 2.2" Photo Frame (Michaels), mineral spirits, Prismacolor Pencils: Periwinkle, Blue Violet Lake, Kelp Green, Marine Green, Black.

Instructions: Stamp flower image and sentiment together on Solar White with Onyx Black placing so as to fit inside your frame opening. Color image with pencils and add White Opal Liquid Pearls to flower centers. Trim image to fit inside frame. Stamp Posy Patch Flowers (3 - smallest, 1 each next two sizes up) on Solar White with Onyx Black. Color with pencils and cut with matching dies. Lightly mist with water on back and shape with mat and tool kit. With Green Linen Cardstock, cut 1 small leaf (HCD 751) and 1 small vine (HCD 750). Pinch leaves together slightly with fingers. Add leaves/vines and flowers as shown to frame using glue gun. Make multi-loop bow with string and tool, add to frame as pictured using glue gun. Add button with string to bow with glue dot.