Be Joyful

Rejoice in the Lord always. Again I will say, rejoice! Let your gentleness be known to all men. The Lord is at hand. Be anxious for nothing, but in EVERYTHING by prayer and supplication, with thanksgiving, let your requests be made known to God; and the PEACE OF GOD, which surpasses all understanding, will guard your hearts and minds through Christ Jesus. Philippians 4:4-7

These are verses I memorized years ago and they are written on my heart. There are times when I still need to remember not to be anxious, but I eventually listen to my heart saying these verses. I didn't really understand what the "peace of God" was until I experienced it. It's having peace inside you, even when you're going through heartbreaking situations and trials. It does "surpass ALL understanding" and you know it comes from GOD alone. Praise the Lord for His wonderful promises!


I love, love, love what I do. I am passionate about the things I create and the talents God has placed in me. I SO appreciate the time you take to look at my things and the comments you all leave me!

Blessings to you!

Kathy
Showing posts with label Tags. Show all posts

Wednesday, October 29, 2014

Majestic Morning Elegant Tag - Heartfelt Creations


Happy Wednesday!

It's time for a little Heartfelt Creations inspiration!  This week I have a beautiful floral tag for you!


The base of the tag is made with Spellbinders 5x7 Elegant Labels 4.  The pretty designer paper mat is from the Raindrops on Rose Paper Collection which I used for the color scheme on the Majestic Morning flowers, Burst of Splendor leaves and Garden Romance butterflies. The white "hearts" tucked behind the flowers are from the Raindrops on Roses Die that I cut into pieces.

If this reminds you of my Majestic Blooms Box I posted last month here, that would be because I made these at the same time!  I really love how both projects turned out with these pretty colors and textures!

Be sure to visit the HC Blog to see the beautiful creations by the designers this week!  Also, HC is announcing the new designers and ones that will be leaving the team.  Very sad to see the ladies leave, but I am looking forward to working with the new designers.

I'm submitting this to the following challenges:

Word Art Wednesday Challenge #156 - Anything Goes
Crafty Cardmakers #126 - Cut It Out (die cuts or punches)
Really Reasonable Ribbon #105 - Anything Goes

Thanks for stopping by!

Blessings!

Kathy


Majestic Morning Elegant Tag

Heartfelt Creations Products and Products Carried by HC:

HCPC 3578 - Majestic Morning Background PreCut Set
HCPC 3545 - Open Leaf PreCut Set
HCPC 3480 - Brookside Manor PreCut Set
HCD 742 - Majestic Blooms Die
HCD 736 - Classic Leaf Die
HCD 743 - Raindrops on Roses Die
HCD 723 - Garden Romance Die
HCDP1 240 - Raindrops on Roses Paper Collection
452255 - Grand Calibur
459222 - McGill Paper Blossoms Tool Kit
159223 - McGill Paper Blossoms Molding Mat
Other Products:

Paper: Solar White (Neenah)
Ink: Onyx Black (VersaFine), Peeled Paint Distress (Ranger)
Accessories: Sparkle Sheer Shimmer Spritz (Tsukineko), glue gun, splat mat (Darice), White 1/4" Silk Ribbon (May Arts), Bow-Easy Tool, 1.5” White Netting, String Beads Pearlized (Really Reasonable Ribbon), adhesive pearls, Diamond Stickles (Ranger), Spellbinders Labels 4 & 5x7 Elegant Labels 4 Dies, mineral spirits, Prismacolor Pencils: Clay Rose, Rosy Beige, Black Cherry.

Instructions:

For tag base, die cut 2 Elegant Labels 4 with white card stock and glue wrong sides together using Metal Glue Tip and Art Institute Dries Clear Glue. Using floral designer paper (Raindrops on Roses) and Labels 4, die cut piece and glue to tag.

Stamp flowers (Majestic Morning Background), leaves (Open Leaf) and butterflies (Brookside Manor) on Solar White with Onyx Black. Color flowers and butterflies with pencils and mineral spirits and leaves with Peeled Paint Ink. Die cut all with matching dies and shape with mat and tool kit as desired. I used 9 of the flowers to create 3 different size flowers and 1 bud.

Die cut the Decorative Heart Topper (Raindrops on Roses Die) using white card stock and trim into 3 hearts. Trim piece of white netting and tie center into a fake bow. Trim thank you tag from designer paper. Make multi-loop bow with silk ribbon and Bow-Easy Tool. Trim piece of string beads (approximately 4"). Assemble all as shown arranging flowers and leaves over hearts using glue gun. Tuck netting, string beads and tag under flowers and leaves on bottom and glue in place. Add adhesive pearls and add butterflies as pictured. Add Stickles around pearl in flower center. Spray with Sparkle Sheer Shimmer Spritz and let dry. Add ribbon to top of tag tying to each side.


Wednesday, May 7, 2014

Vintage Floral Tag - Heartfelt Creations


Happy Wednesday!

It's time for some Heartfelt Creations inspiration!  Today I have a vintage floral tag to show you!


(Click on photo for a closer view.)


I really love how this came out!  I love the vintage look of the flowers and leaves with the Aged Ivory Embossing Enamel on the cream card stock.  Coloring with the chalk inks makes this so soft and pretty and much quicker than coloring with pencils.  I only used 2 colors on this also, Aegean Blue and Spanish Olive VersaMagic Inks and applied the color with make-up applicators.  Here's a little close-up for you.


Here's a different angle for you.  I love the beautiful lace on the bottom!


Be sure to visit the HC Blog to see the beautiful creations by the designers this week!  We have a new  member on our Design Team, Loretta Lock, who is returning to the DT.  Welcome Loretta!

You can also see another sneak peek of the new Sweet Lullaby Collection being released next week!

I'm submitting this to the following challenges:

Word Art Wednesday Challenge #131 - Anything Goes.

Thanks so much for stopping by!  I hope I leave you inspired!

Blessings!

Kathy


Vintage Floral Tag

Heartfelt Creations Products and Products Carried by HC:

HCPC 3598 - World Map PreCut Set
HCPC 3596 - Celebrate the Journey Sentiments
HCPC 3577 - Vintage Morning Background PreCut Set
HCPC 3545 - Open Leaf PreCut Set
HCD 744 - Once Upon a Time Die
HCD 742 - Majestic Blooms Die
HCD 736 - Classic Leaf Die
HCDP1 - 242 - Celebrate the Journey Paper Collection
452255 - Grand Calibur
159723 - Art Institute Glue - Dries Clear
SMP001 - Stamp Mat Pad
459222 - Paper Blossoms Tool Kit
048749 - Paper Shaping Tools & Piercing Mat
159223 - Paper Blossoms Molding Mat

Other Products:

Paper: Natural White (Neenah), Mist (Worldwin)
Inks: Antique Linen Distress Ink (Ranger), Aegean Blue, Spanish Olive Chalk Inks (VersaMagic), VersaMark Watermark
Accessories: Trim (Jo-Anns), Cream Seam Binding, Bow-Easy (Really Reasonable Ribbon), fibers, adhesive pearls, Diamond Stickles (Ranger), Aged Ivory Embossing Enamel (Stampendous), heat tool, glue gun, Splat Mat (Bazzills), hole punch, Scor-Tape 1/8", make up applicators, 1 1/2” circle punch.

Instructions: Cut 3” x 6” piece of light blue designer paper. Stamp with World Map image using VersaMark and heat emboss with Aged Ivory Embossing Enamel. (Note: Heat emboss from underneath image to keep gold specks.) Cut 2 top corners at 1/2” angle as shown to create tag shape. Ink edges with Antique Linen. Cut Natural White card stock slightly larger than tag, glue to back of blue tag and cut top corners to match. Punch hole on top center for ribbon. Add lace, ribbon, and trim to lower portion of tag using Scor-tape as pictured. On Natural White card stock with VersaMark stamp flowers, leaves, and Celebrate the Journey Sentiments and heat emboss with Aged Ivory Embossing Enamel in the same manner as the tag. Color flowers and leaves with chalk inks and die cut with matching dies. Clip flower petals apart and shape with mat and tool kits as desired. Die cut sentiments with matching die and select the Youre the best, the wheel, and medallion, then ink edges with Antique Linen. Assemble by gluing the sentiment, wheel, 1 1/2” circle with Mist card stock together, add to medallion with pop dots, then add to tag as pictured with pop dots. Arrange flowers and leaves on tag as pictured and glue in place with glue gun. Add adhesive pearls to flower centers, bow, and tag. Add Diamond Stickles around pearls in flower centers. Tie ribbon and fibers to tag top.


Thursday, April 24, 2014

Especially For You Pocket Tag - Heartfelt Creations


Happy Thursday!

I'm back again as promised with another project for Heartfelt Creations!  This time I have a pocket tag with a more feminine design on in!


Here's a picture of the tag outside the pocket tag.


I created the tag with the pocket by using the Luggage & Tags Die and a folded piece of the designer paper.  The map image on the blue designer paper is the same image I used yesterday for the masculine tag.  I love this map image for a background and that it works for both feminine and masculine projects.

The small tag is one of the stamp images die cut with one of the smaller tag dies.  There are lots of tag designs you can make with this collection!

The coloring on the flowers and leaves was done using chalk inks and make up applicators.  I like how it came out with the heat embossed images using the Aged Ivory Embossing Enamel.  I love coloring with pencils and mineral spirits, but I really liked how quick and easy this was for a change of look.

I'm submitting this to the following challenges:

Word Art Wednesday Challenge #129 - Anything Goes.

Thanks for stopping by!

Blessings!

Kathy


Especially for You Pocket Tag

Heartfelt Creations Products and Products Carried by HC:

HCPC 3598 - World Map PreCut Set
HCPC 3600 - All Occasion Sentiments PreCut Set
HCPC 3577 - Vintage Morning Background PreCut Set
HCPC 3545 - Open Leaf PreCut Set
HCD 745 - Luggage & Tags Die
HCD 742 - Majestic Blooms Die
HCD 736 - Classic Leaf Die
HCDP1 - 242 - Celebrate the Journey Paper Collection
452255 - Grand Calibur
368770 - Scor-Pal
159723 - Art Institute Glue - Dries Clear
SMP001 - Stamp Mat Pad
459222 - Paper Blossoms Tool Kit
048749 - Paper Shaping Tools & Piercing Mat
159223 - Paper Blossoms Molding Mat

Other Products:

Paper: Natural White (Neenah)
Inks: London Fog (Memento), Antique Linen Distress Ink (Ranger), Wheat, Aegean Blue, Spanish Olive (VersaMagic), VersaMark Watermark
Accessories: Trim (Jo-Anns), Cream Seam Binding, Bow-Easy (Really Reasonable Ribbon), fibers, adhesive pearls, Diamond Stickles (Ranger), Aged Ivory Embossing Enamel (Stampendous), heat tool, glue gun, hold punch, Scor-Tape 1/8", make up applicators.

Instructions: Cut piece light blue designer paper approximately 3" x 6 1/4". Stamp World Map image with London Fog Ink. Score 3" side at 2" and again at 1/4". Fold up over front as pictured at 2" score, then die cut with tag die placing the fold slightly inside the bottom of the die edge. Then fold down 1/4" score as pictured creating a small light blue edge. Adhere edging down with Scor-tape. Add scor-tape to the left and right inside, 2" sides to create a pocket. Ink edges with Antique Linen Ink. Die cut another tag with Natural White and glue to the back of the tag. Add trim to pocket as pictured with Scor-tape. On Natural White with VersaMark, stamp flowers, leaves (2 - 5-leaf stems) and All Occasion Sentiments. Heat emboss with Aged Ivory Embossing Enamel heating from underneath.  Die cut flowers and leaves with matching dies. Die cut sentiment with tag from Luggage & Tags Die. Color 2 of the second largest flowers with Aegean Blue and make up applicators. Color the leaves with Spanish Olive. Ink edges slightly with Antique Linen. Shape as desired with mat and tools. Arrange stems and flowers as pictured using glue gun. (I trimmed one of the flowers and a couple of leaves to arrange it to fit nicely on the tag.) Add adhesive pearl and stickles to flower center. Punch larger hole on top of tag if needed and add fibers and seam binding for a tie. Ink edges of small sentiment tag with Wheat Ink. Add fibers for a tie. Make a 5-loop mini bow with yellow and white fibers held together. Add to sentiment tag with glue dots. Add adhesive pearl to bow and flower center.


Wednesday, April 23, 2014

Masculine Tag - Heartfelt Creations


Happy Wednesday!

It's time for some Heartfelt Creations Inspiration!  Today I have a masculine tag for you!


Boy do I have a hard time making masculine projects!  I have to restrain myself from adding bows and flowers and it always looks too plain.  This one didn't come out too bad.  I do love the Clear Bark embossing powder on the light blue designer paper along with the dark brown card stock and ribbon.

Here's a little close up of the elements for you.


Be sure to visit the HC Blog to check out all the beautiful creations by the designers this week!  You can also see a new video from Emma Lou with a fun technique to show you.

Check back tomorrow for my second project I made for HC this week!

I'm submitting this to the following challenges:

Word Art Wednesday Challenge #129 - Anything Goes

Thanks for visit today!

Blessings!

Kathy

Masculine Tag

HC Products:

HCPC 3598 - World Map PreCut Set
HCPC 3596 - Celebrate the Journey Sentiments PreCut Set
HCD 744 - Once Upon a Time Die
HCDP1 - 242 - Celebrate the Journey Paper Collection
452255 - Grand Calibur
368770 - Scor-Pal
159723 - Art Institute Glue - Dries Clear
DDOTS - Double Dots
SMP001 - Stamp Mat Pad
354806 - Standard Circles Large
031473 - Elegant Labels Four

Other Products:

Paper: Natural White (Neenah), Mist (WorldWin), dark brown card stocks
Inks: VersaMark Watermark, Java (PowderPuffs)
Accessories: Clear Bark Embossing Powder (Recollections), heat tool, ribbon (Michaels), twine, star button, pop dots, glue dots, hole punch.

Instructions: Cut light blue designer paper 3" x 5 1/4", stamp with World Map image using VersaMark, and heat emboss with Clear Bark Embossing Powder. Cut top 2 corners at 1/2" as shown. Ink edges with Java Chalking Ink. Cut mat with dark brown cs slightly larger, glue to dp piece, and trim top 2 corners. Cut another mat with Mist cs in same manner and hold aside. Stamp Celebrate the Journey Sentiments on Natural White cs with VersaMark and heat emboss with Clear Bark EP. Die cut with matching die. Select 3 pieces shown (The World sentiment, medallion circle, and pocket watch), ink edges with Java. Cut circle shape with dark brown cs using circle die. Add The World sentiment circle to medallion circle with pop dots and glue these to dark brown circle with glue in the center. Add pocket watch to tag as pictured using pop dots. Die cut smallest die from Elegant Labels Four using Mist cs, ink edges with Java, and thread piece of brown ribbon through side as shown. Add double dots under center of label, add to tag wrapping ribbon around back and securing in place. Add Mist mat to back of tag. Glue circle sentiment to tag as shown. Punch opening for ribbon tie on top with hole punch. Add piece of ribbon tied in knot. Add star button with twine bow to center of knot as shown.

Monday, December 2, 2013

Grandma's Goodies Tag


Happy Monday!

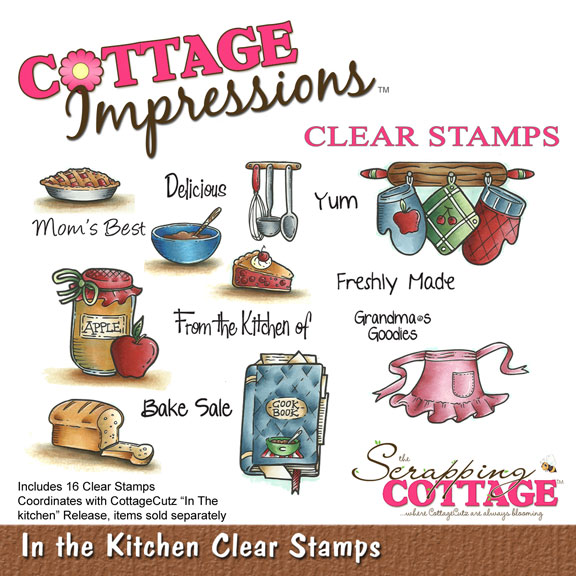
Today I have a cute gift tag I made using the Fancy Insert Card/Tag and In the Kitchen Clear Stamps by Cottage Impressions!


This tag die comes in handy for lots of things and I thought it would be perfect as a tag for baked goodies!  I LOVE the images from this stamp set, they're so cute and fun to color!  (Unfortunately, I just realized the stamp set is retired now!)

Here's a close up of the pie and cookbook images.


Aren't they cute?  I stamped them on white cardstock with black ink and colored them with pencils.  I then fussy cut them which was very easy, and inked the edges a little with black.

I die cut the tag using Visions of Christmas paper by K & Co. stamped it with "Grandma's Goodies" sentiment from the set, and inked the edges with brown ink.  I added the images to the tag with pop dots and added some baby rick rack.  I punched a hole in the tag and added some white jute for a tie and then added a bow, button and twine.

Here are the Scrapping Cottage stamp and die I used:


http://www.scrappingcottage.com/cottagecutzfancyinsertcardtagpre-order.aspx


Tag recipe:

CottageCutz Die: Fancy Insert Card/Tag
Stamps: In the Kitchen Clear Stamps (Cottage Impressions) (Retired)
Paper: Visions of Christmas (K & Co), Solar White (Neenah)
Ink: Onyx Black (VersaFine), Amaretto (Powder Puffs)
Accessories: Blue Jay Seam Binding, White Jute (Really Reasonable Ribbon), twine (May Arts), Bow-Easy, black baby rick rack (Wrights), white gel pen, button, hole punch, mineral spirits, Prismacolor Pencils: Cool Grey 10%, 90%, Black, Ginger Root, Light Umber, Chocolate, Yellow Ochre, Goldenrod, Denim Blue, Indigo Blue

I'm submitting this to the Really Reasonable Ribbon Challenge #85 - BINGO & Ribbon (White, Baker's Twine, Button)

Thanks for stopping by!

Blessings!

Kathy