Happy Wednesday everyone!
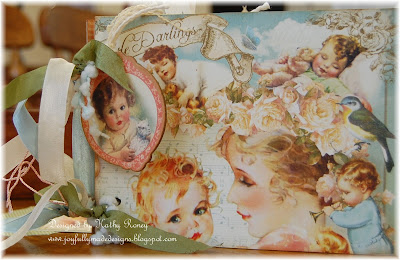
I have a fun project today using the beautiful Raindrops on Roses Collection from Heartfelt Creations! I bought this 6" x 6" Scrapbook Page Holder at Michaels and thought it would be perfect for the 6" x 6" designer paper blocks in the collection!
Here is the holder showing the cover decorated with lace, ribbon bows, and pearls. I used the beautiful Raindrops on Rosettes image and Raindrops on Roses Die behind it for the front cover.
Here is a close up of the image that I stamped on Solar White Card stock and colored with pencils and mineral spirits. It's been a very long time since I colored images with skin and I'm definitely out of practice!
I just love the beautiful colors of these designer papers and tried to color the image to match. You can see the two new dies behind the image, a green oval shaped lacy die and then two of the other die cut with white. These dies are so beautiful and have so many possibilities to create with!
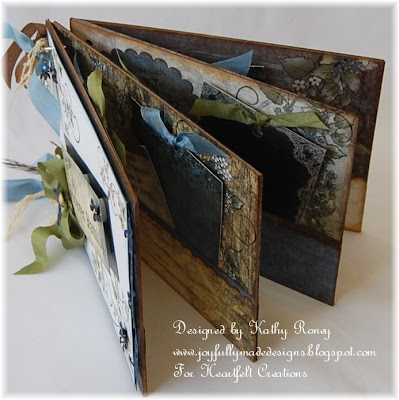
These are photos of the individual pages I made with the designer papers. Each is different and made with the card fronts, tags, and journals blocks from the papers. Very quick and easy to put together! You can always add embellishments after adding your photos!
Be sure to visit the HC Blog today to see what the designers have for you!
I'm submitting this to the Word Art Wednesday Challenge #120 - Anything Goes
Thanks for stopping by today!
Blessings!
Kathy
Scrapbook Page Holder
Heartfelt Creations Products and Products Carried by HC:
HCPC 3585 - Raindrops on Rosettes PreCut Set
HCDP1 240 - Raindrops on Roses Paper Collection
HCD 743 - Raindrops on Roses Die
452255 - Grand Calibur
368770 - Scor-Pal
Other Products:
Paper: Solar White (Neenah), Crushed Olive Distressed (Coredinations), cream (Recollections)
Inks: Onyx Black (VersaFine), Wheat (VersaMagic)
Accessories: 6" x 6" Scrapbook Page Holder (Recollections), adhesive pearls (Want-2-Scrap), White Silk Ribbon (May Arts), button, trims (Jo-Ann's), Ivory Jute String (May Arts), brad, Bow-Easy, Standard Circles Large (Spellbinders), mineral spirits, Prismacolor Pencils: Cream, Light Peach, Pink Rose, Jasmine, Deco Pink, Blush Pink, Black Cherry, Rosy Beige, Clay Rose, Goldenrod, Yellow Ochre, Chocolate, Kelp Green, Marine Green, Sepia, Espresso
Instructions: For front cover, stamp face image on Solar White with Onyx Black Ink and color with pencils. Die cut with circles die and ink with Wheat Ink. With Crushed Olive card stock, die cut oval flourish from Raindrops on Roses Die. Add image to die cut with pop dots and glue to journal block from designer paper. Die cut 2 large flourishes from the Raindrops on Roses Die with white card stock. Glue to 6" x 6" block as shown with image. Trim 2 tags from designer paper and add as shown with pop dots and glue dots. Add an adhesive pearl to top of tags. Add trims and bows to top of the page protector. Add large bow to base with glue dots. Add large pearl button to center of bow. Use 6" x 6" designer papers for the scrapbook pages and decorate with card fronts, journal blocks, and sentiments.


