Be Joyful

Rejoice in the Lord always. Again I will say, rejoice! Let your gentleness be known to all men. The Lord is at hand. Be anxious for nothing, but in EVERYTHING by prayer and supplication, with thanksgiving, let your requests be made known to God; and the PEACE OF GOD, which surpasses all understanding, will guard your hearts and minds through Christ Jesus. Philippians 4:4-7

These are verses I memorized years ago and they are written on my heart. There are times when I still need to remember not to be anxious, but I eventually listen to my heart saying these verses. I didn't really understand what the "peace of God" was until I experienced it. It's having peace inside you, even when you're going through heartbreaking situations and trials. It does "surpass ALL understanding" and you know it comes from GOD alone. Praise the Lord for His wonderful promises!


I love, love, love what I do. I am passionate about the things I create and the talents God has placed in me. I SO appreciate the time you take to look at my things and the comments you all leave me!

Blessings to you!

Kathy
Showing posts with label Notepad. Show all posts

Wednesday, August 16, 2017

Christmas Blessings Covered Notepad


Happy Wednesday!

It's time for more Heartfelt Creations' inspiration using their new Winter's Eve Collection!

This week I have a fun and simple project you can make for gift giving at Christmastime.


You can click on the image to get a better close-up view if you like.

The pink papers are from the Winter's Eve Paper Collection.  I used them for the mats and also to make the flowers.  The flowers were done with white embossing powder and shaped using the Deluxe Flower Shaping Kit.  Behind the flowers is the beautiful decorative die from the Window Box Elements Die Set.

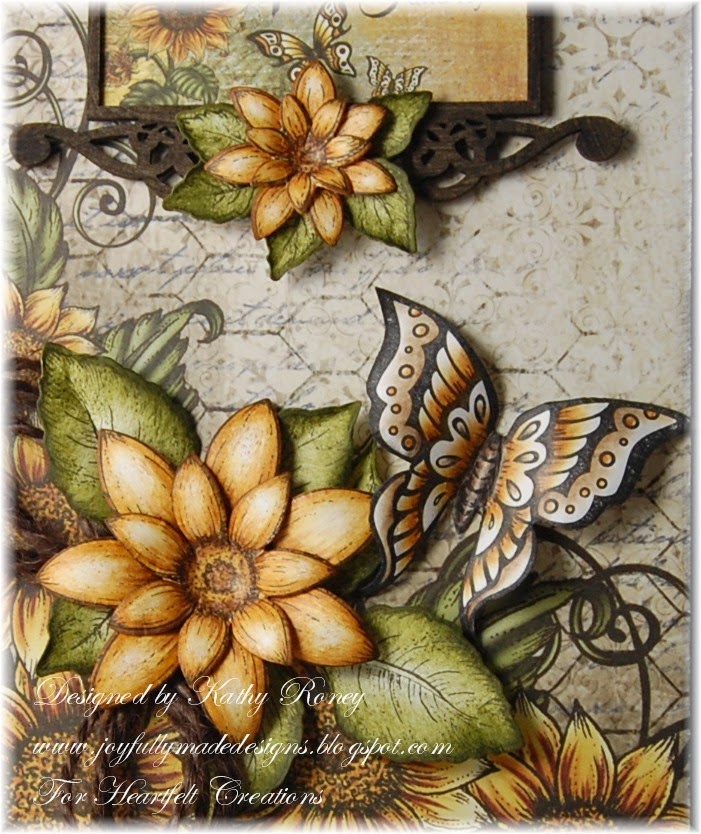
Here's a little closeup of the flowers.


Here's a view of the inside of the pad.


Be sure to visit the Heartfelt Creations' Blog to see all the beautiful projects by the designers this week.

I'm submitting this to the following challenge:

Word Art Wednesday #296-297 - Anything Goes

Thanks so much for stopping by to visit!

Blessings!

Kathy


Christmas Blessings Covered Notepad

Heartfelt Creations Products and Products Carried by HC:

HCPC 3796 - Winter's Eve Set
HCPC 3745 - Ornate Sleigh Set
HCPC 3747 - Celebrate the Season Set
HCD1-7150 - Window Box Elements Die
HCD1-7106 - Celebrate the Season Die
HCD1-7104 - Ornate Sleigh & Presents Die
HCDP1-281 - Winter's Eve Paper Collection
368770 - Scor-Pal
Deluxe Flower Shaping Kit
159723 - Designer Dries Clear
Other Products: Paper: Recollections White; Ink: VersaFine Onyx Black, VersaMark; Accessories: Clear Wink of Stella, Xyron Machine, pop dots, Scor-Tape, 2 1/2" x 8" White Notepads (Papertrey Ink), Large Oval Punch (Stampin Up), edge distressor, White Embossing Powder (Stampin Up)

Instructions: Covered notepad measures 2 5/8" x 8 1/4". Follow the instructions found here on Split Coast Stampers with the exception of the 2 pieces of pattern paper used to cover the front and inside of pad, I cut mine 2 3/8" x 8" instead. I used the pink designer paper from the Winter's Eve Paper Collection for these pieces, the piece to cover the top of the notepad and for the flowers. Distress the 2 mats before adhering to the front and inside covers.

To decorate the front cover, die cut the decorative die from the Window Box Elements Die Set using white cardstock. Run it through the Xyron Machine and adhere as pictured. Using VersaMark Ink on the pink designer paper, stamp the small flowers and leaves from the Ornate Sleigh Set twice and the large flowers and leaves from the Celebrate the Season Set twice, then heat emboss with white embossing powder. Die cut with the match dies from Celebrate the Season and Ornate Sleigh & Presents Dies. Shape the flowers and leaves with the Deluxe Flower Shaping Kit, glue the flowers and leaves together and then glue the 2 larger flowers and 1 smaller flower to the pad as pictured.

Stamp the sentiment from the Winter's Eve Set on white cardstock with Onyx Black Ink and use the Large Oval Punch to cut it. Add to the pad using pop dots. Glue the remaining smaller flower as pictured. Add Minnie Pearl Prills to the flower centers using Designer Dries Clear Glue. Add Clear Wink of Stella to the flowers and leaves as desired.

Wednesday, September 24, 2014

Classic Sunflower Notepad - Heartfelt Creations


Happy Wednesday!

It's inspiration time from Heartfelt Creations!  Today we are doing a blog hop with Creative Embellishments so you will see lots of inspiration from designers using their beautiful products.  To see the beautiful inspiration from Creative Embellishments, click here.

My project today is a covered junior notepad.


(You can click on the photo for a better view.)


Here's a look at the inside.


Here's a little close up of the beautiful flowers and butterfly on the cover.


I love making these notepads, they make beautiful gifts with a matching card.  I used the Junior Legal Pad Wish List tutorial from Split Coast Stampers here, adjusting the measurements for a full size pad.  I've included the adjusted measurements in the instructions at the bottom of my post.

I used the Classic Sunflower designer papers to embellish the pad cover and pad topper.  The frame on the cover is from Creative Embellishments' Mini Ornate Frames set that I painted with black acrylic paint and added a piece of designer paper to the back of it.  I embellished the cover with flowers, leaves and a butterfly from the Classic Sunflower Collection.  The flowers and butterfly were colored with pencils and mineral spirits and the leaves were inked with Forest Moss Distress Ink.

Be sure to visit the HC Blog to see the beautiful creations by the designers this week!  Emma Lou also has a new video showing you a fun coloring technique and a sneak peek of the All Geared Up Collection being released October 8th!

I'm submitting this to the following challenge:

Word Art Wednesday Challenge #151 - Anything Goes

Thanks for stopping by to visit!

Blessings!

Kathy


Classic Sunflower Notepad

Heartfelt Creations Products and Products Carried by HC:

HCPC 3630 - Summer's Day PreCut Set
HCPC 3626 - Classic Sunflower PreCut Set
HCPC 3545 - Open Leaf PreCut Set
HCD 753 - Classic Sunflower Die
HCD 736 - Classic Leaf Die
HCDP1 - 247 - Classic Sunflower Paper Collection
452255 - Grand Calibur
368770 - Scor-Pal
459222 - McGill Paper Blossoms Tool Kit
159223 - McGill Paper Blossoms Molding Mat
SMP001 - Stamp Mat Pad
Metal Glue Tip

Other Products:

Paper: Solar White (Neenah), Black (Recollections), More Mustard (SU)
Ink: Onyx Black (VersaFine), Forest Moss, Vintage Photo Distress (Ranger)
Accessories: Black acrylic paint dauber (Ranger), Mini Ornate Frames (Creative Embellishments), Dark Brown Jute String (Really Reasonable Ribbon), Scor-tape, sponges, bow maker tool, craft knife, cutting mat, pop dots, Fast Grab Tacky Glue (Aleenes), Junior Size Writing Pad (office supply store), mineral spirits, Prismacolor pencils: Black, Yellow Ochre, Goldenrod, Burnt Ochre, Chocolate, Ginger Root, Sandbar Brown.

Instructions: Use tutorial from Split Coast Stampers for Junior Notepad found here using adjusted measurements as noted. Base: Cut More Mustard 10 1/2” x 8 1/4”, score at 5 1/8” and 5 3/8”.  Pad Topper: Cut designer paper 4 7/8” x 2 1/8” and score at 7/8” and 1 1/8”.  Add to pad top with double-sided tape following the tutorial.  Add pad to inside of base with double-sided tape following the tutorial.  Mat for inside: Cut designer paper 8” x 4 7/8”, ink edges with Forest Moss, and glue to base.  Mat for front: Cut Black mat 4 15/16" x 8 1/16" and glue to base.  Cut designer paper piece shown for front cover measuring 4 3/4" x 7 7/8", ink edges with Black Ink, glue to black mat and glue both to front cover.

Paint Mini Ornate Frame with black acrylic paint and let dry. Select image from designer paper tag assortment sheet, trim to fit behind frame, glue with Art Institute Glue and Metal Glue Tip. Trim any excess with craft knife and cutting mat. Add to notepad cover as pictured using pop dots.

On Solar White with Onyx Black, stamp Classic Sunflower, butterfly from Summers Day Set, 2 of 3-leaf stems, 1 of 9-leaf stems from Open Leaf Set. Color flowers and butterfly with pencils and mineral spirits. Fussy cut butterfly and shape as desired. Die cut flowers with Classic Sunflower Die, shape with mat and tool kit, glue together to form a small flower and a larger one. Die cut leaves with Classic Leaf Die, ink with Forest Moss Ink using sponge and shape with mat and tool kit. Make large 3-loop bow with Jute String and add to cover using Fast-Grab Glue. Arrange flowers, leaves (small leaves are cut into pieces) and butterfly as shown and glue all down.


Wednesday, July 2, 2014

Matchbook Post-It Note Holder - Heartfelt Creations


Happy Wednesday!

It's inspiration Wednesday for Heartfelt Creations!  Today I have a cute little post-it note holder I made using the Arianna Blooms Paper Collection and 3 of the Heartfelt Creations Dies.


Here's a side view so you can see the Post-It and how it's put together.


This was really easy to put together and I think it makes for a cute gift!  I used the “Matchbook Post-It Note Holder” Tutorial on Split Coast Stampers found here.  You can find the instructions for how I decorated mine at the end of my post, if you will like to try making one yourself!

Be sure to visit the HC Blog to see all the beautiful projects by the designers this week!

I'm submitting this to the following challenges:

Word Art Wednesday #139 - Anything Goes

Thanks for stopping by today!

Blessings!

Kathy


Matchbook Post-It Note Holder

Heartfelt Creations Products and Products Carried by HC:

HCDP1 244 - Arianna Blooms Paper Collection
HCD 745 - Luggage and Tags Die
HCD 740 - Sweet Juliet Die
HCD 732 - Decorative Flower Pot Die
452255 - Grand Calibur
368770 - Scor-Pal
SMP001 - Stamp Mat Pad
Spring Bling Prills
159723 - Art Institute Glue - Dries Clear

Other Products:
Paper: White heavy card stock
Ink: Hint of Pesto (VersaMagic)
Accessories: Button, white embroidery floss, adhesive pearls, pop dots, Scor-tape, 3" x 3" Post-It Note, 1/4" White Silk Ribbon (May Arts), Bow-Easy (Really Reasonable Ribbon).

Instructions: Using heavy white card stock, make matchbook Post-It note holder using the Split Coast Stampers tutorial found here. Use the adjusted measurements for the 3" x 3" size listed under “Variations”. Die cut the edge of the card stock piece with the Decorative Flower Pot Die by slipping it in the die to cut the scalloped edge only. Mat the front and inside cover with designer papers. Die cut leaves from dark green designer paper using the Sweet Juliet Die. Fussy cut one of the pink blooms from the designer paper, clip between the petals, mist lightly with water and shape with mat and tool kit. Glue leaves and flower as pictured. Cut tag from designer paper and add as pictured using glue and a pop dot in the center. Add adhesive pearls, bow with button and embroidery floss. Add Lemon Chiffon Prills to flower center using Art Institute Glue Dries Clear.

Wednesday, January 1, 2014

Sun Kissed Card and Notepad


Happy New Year!

I hope everyone had a fun New Year's Eve last night!  I can't believe it's 2014 already!  Time is going by so quickly!

Well, it's Wednesday, and that means I have a little inspiration to show you from Heartfelt Creations!  This week I have a a simple card and matching junior size notepad I made using the Sun Kissed Collection from last May.  I love making these covered notepads for gifts and they are so easy to do too!  Here is the front of both.


This shows the inside of the notepad.


Here's a closer look at the card.  A very simple card to make.   I just used a floral corner from one of the beautiful designer papers and added a sentiment on the bottom!  So easy and so beautiful!


I hope you enjoyed my projects today.  Be sure to visit the Heartfelt Creations Blog to see all the beautiful creations by the designers this week!

I'm submitting this to the following challenges:

Word Art Wednesday Challenge #113 - Anything Goes.

Thank you for stopping by!

Blessings!

Kathy


Sun Kissed Card & Notepad

Heartfelt Creations Products and Products Carried by HC:
HCPC 3533 - Sun Kissed Fleur PreCut Set
HCPC 3537 - Sun Kissed Fleur Swirls PreCut Set
HCPC 3354 - Classic Messages PreCut Set
HCPC 3309 - Faith Hebrews 11:1 PreCut Set
HCD 734 - Sun Kissed Fleur Die
HCD 735 - Gift Ensemble Die
HCDP1 233 - Sun Kissed Paper Collection
Product ID: 209503 - Floral Ovals Die
Product ID: 354802 - Classic Ovals Large Dies
Product ID: 452255 – Grand Calibur
Product ID: 368770 – Scor-Pal
Product ID: 459222 - McGill Paper Blossoms Tool Kit
Product ID: 159223 - McGill Paper Blossoms Molding Mat
Product ID: 159723 - Art Institute Glue - Dries Clear

Other Products Used:
Paper: Solar White (Neenah), Baja Breeze (SU), Crushed Olive, Shazam
(Coredinations), Mango (Bazzills)
Ink: Onyx Black (VersaFine), Pumpkin Spice (VersaMagic)
Accessories: Bow-Easy, repurposed button, twine, White Seam Binding, lace trim (Really Reasonable Ribbon), adhesive pearls (Want-2-Scrap), Memo Pad 5" x 8" (Office Supply Store), Classic Scalloped Ovals Large Dies (Spellbinders), mineral spirits, Prismacolor Pencils: Muted Turquoise, Indigo Blue, Kelp Green, Marine Green

Instructions: Card measures 5 1/2" x 4 1/4" with Baja Breeze cardstock.  But mat with
Shazam cardstock measuring 5 5/16" x 4 1/16".  Cut designer paper from corner of 12" x 12"
piece measuring 5 1/8" x 3 7/8", stamp sentiment with Onyx Black in lower right corner,
and ink edges with Pumpkin Spice.  Glue two mats together, wrap with lace trim and secure.  Add mat with pop dots to card base.  Add bow and button with twine as shown.
Notepad: Use tutorial from Split Coast Stampers for Junior Notepad
(http://www.splitcoaststampers.com/resources/tutorials/junior_legal_pad_wishlist) using  adjusted measurements as noted. Base: Cut Baja Breeze 10 1/2” x 8 1/4”, score at 5 1/8” and 5 3/8”.  Pad Topper: Cut designer paper 4 7/8” x 2 1/8” and score at 7/8” and 1 1/8”.  Add to pad top with double-sided tape following the tutorial.  Add pad to inside of base with double-sided tape following the tutorial.  Mats for front and inside: Cut 8” x 4 7/8” using Shazam paper for front and designer paper for inside, ink edges with Pumpkin Spice, and glue to base.  Cut designer paper piece for front measuring 7 13/16" x 4 11/16" with pattern in lower left corner.  Stamp flower swirl image in top right corner with Onyx Black and color with pencils. Stamp Sun Kissed Fleur flowers on Solar White with Onyx Black and color 5 of the flowers with pencils to match the designer paper.  Cut with matching die and shape with mat and tool kit.  Cut 2 leave sprays from the Gift Ensemble Die with Crushed Olive.  Assemble leaves and 2 of the larger flowers over the image on the designer paper in the lower left corner.  Cut Mango cardstock with Floral Ovals Die and add as shown with pop dots.  Cut Baja Breeze with ovals die and trim around edge of embossed area to fit in Floral Oval as shown.  Stamp Faith verse on Solar White with Onyx Black, cut with Scalloped Ovals Die, and sponge with Pumpkin Spice.  Glue to ovals diecut and add over Mango Floral Oval with pop dots.  Add 3 remaining flowers over corner image on top right as shown.  Add adhesive pearls.

Wednesday, November 28, 2012

Heartfelt Creations - Inspiration Timeless Amour Collection

Happy Wednesday!

It's time for some Heartfelt Creations' inspiration using.  This week, both my projects are made with the new Timeless Amour Collection.  The first is a card:


 I love this color combination and I just love to color!  So many pretty little roses and vines on this image and I love the look with the leaves and flowers around it.

The second project I have is an altered mini composition notebook packaged up as a gift.  Here is the book by itself:


The book with the packaging pieces:


Here is the book all packaged up and ready to give as a gift:


Here is a close up of the tag I made with the little heart die...I think this is so cute!


I hope this give you a little inspiration on using these beautiful HC Products!  Also, a cute little gift idea for someone special!  Be sure to visit the HC Blog to see all the beautiful creations from the designers this week!

I'm submitting the card to the latest Word Art Wednesday Challenge # 56.
I'm submitting the notepad to the Really Reasonable Ribbon Challenge #60 - Anything but a card & ribbon.

Blessings!

Kathy


This is Your Day Card

Heartfelt Creations Products & Products Carried by HC:

HCPC 3500 – Open Vintage Floret PreCut Set

HCPC 3505 – Timeless Rosette PreCut Set

HCPC 3502 – Mini Vintage Floret PreCut Set

HCPC 3390 – Bella Rose Leaves PreCut Set

HCD 728 – Timeless Amour Die

HCD 727 – Vintage Floret Die

HCD 712 – Bella Rose Die

HCDP1 – 228 – Timeless Amour Paper Collection

Product ID: 159223 - Paper Blossoms Molding Mat

Product ID: 459222 - Paper Blossoms Tool Kit

Product ID: 159723 – Art Institute Glue – Dries Clear

SF03602 - Prismacolor Pencil Set 120 pc.

DDOTS Double Dots 100 pc.

Other Products Used:

Paper: Capers (Bazzills), Burgundy Linen (Recollections), Solar White (Neenah)

Ink: Onyx Black (VersaFine), Always Artichoke (Stampin’ Up!)

Accessories: Fleur de List Squares (Spellbinders), ribbon (Michaels), adhesive pearls (Recollections), oval pearl (stash), Bow-Easy, sponge, mineral spirits, Prismacolor Pencils colors: Rosy Beige, Clay Rose, Black Raspberry, Black, Marine Green


Instructions:

Card base: With Capers, cut 5 1/2" x 10 1/4", score at 5 1/8”, and fold.  Mat: cut green designer paper 4 7/8” x 4 7/8”, ink edges with Always Artichoke, and place aside.

Image: On Solar White with Onyx Black, stamp image (Timeless Rosette), color with pencils, and cut with Fleur de Lis Square Die.  Cut Burgundy cardstock 3 1/2" x 3 1/2".  Cut piece burgundy ribbon about 7” and thread through openings on lower portion of image die cut.  Glue burgundy mat on back on image (over ribbon), placing so about 1/8” of burgundy shows behind image.  Add image to green mat with pop dots, wrap ribbon around mat and tape down.  Add to card base.

Embellishments:  On Solar White with Onyx Black, stamp 2 smallest flowers (Open Vintage Floret) and 1 each of the 2 smaller open flowers (Mini Vintage Floret).  Color with pencils and cut with matching dies.  Stamp Bella Rose Leaves on green designer paper with Always Artichoke, cut with matching die, shape and ink as desired.  Cut and piece leaves and add the flowers as shown.  Add bow and pearls.


Timeless Notepad Gift

Heartfelt Creations Products & Products Carried by HC:

HCPC 3500 – Open Vintage Floret PreCut Set

HCPC 3502 – Mini Vintage Floret PreCut Set

HCD 728 – Timeless Amour Die

HCD 727 – Vintage Floret Die

HCPC1 228 – Timeless Amour Paper Collection

Product ID: 159223 - Paper Blossoms Molding Mat

Product ID: 459222 - Paper Blossoms Tool Kit

Product ID: 159723 – Art Institute Glue – Dries Clear

Product ID: 273900 - Zip Dry Paper Glue

DDOTS Double Dots 100 pc.

SF03602 - Prismacolor Pencil Set 120 pc.

Other Products Used:

Paper: Natural White (Neenah), Bravo Burgundy (Stampin’ Up!)

Ink: Onyx Black (VersaFine), Mocha Mama (Powder Puffs)

Accessories: Labels 20 (Spellbinders), Very Vanilla Seam Binding, Corner Rounder Punch (SU), key charm, bead spacer, ribbon, trim (Michaels), Sookwang Adhesive Tape, Sparkle Shimmer Spritz (Imagine Crafts), mini composition notepad (Target), sponge, cotton fiber (stash), adhesive pearls (Recollections), craft knife, craft mat, A-2 Cello bag (Clear Bags), schreddies, Bow-Easy, 1/8” hole punch

Instructions:

Notepad: Cut piece of designer paper with pattern large enough to cover notepad.  Use Sookwang Tape (or Scorepal type tape) to adhere paper to front (only) of book leaving side with binding open.  Trim excess paper from around front 3 sides of book edge.  Add piece of ribbon (approximately 10”) for bookmark to top portion of book binding with Sookwang Tape.  Cover binding and remainder of notepad with designer paper and trim excess.  Ink edges with Mocha Mama.

Embellishments: Add piece of trim to front left of book as shown.  Add charm and spacer to end of ribbon and trim excess.  Cut label for front with designer paper using Labels 20 Die, ink edges, and add to book with pop dots.  Stamp flowers on Natural White with Onyx Black as follows: 2 smallest flowers (Open Vintage Floret Set) 2 leaf shaped flowers, 2 smallest flowers, and 1 next size up (Mini Vintage Floret Set).  Color with pencils, shape and assemble as shown, spray with Spritz and let dry.  Add pearls to flower centers using Zip Dry for extra hold.  Add larger flower to book and put aside smaller flower for packaging.  

Packaging: Add schreddies and book to cello bag.  For topper, cut designer paper 3” x 4 1/2”, score at 1 1/2" lengthwise, and fold.  Round bottom corners with corner rounder punch.  Close bag and add topper with tape.  Make bow with Bow-Easy, spritz, and crinkle and let dry.  Add bow and flower to topper.

Tag: With Natural White, folder piece paper, cut with heart die with left edge of die slightly over the fold.  Cut small lace heart with Bravo Burgundy paper and glue to front of tag.  Add adhesive pearls as desired.  Punch 1/8” hole by fold and add string.


Wednesday, August 1, 2012

Heartfelt Creations - Raspberry Swirl & Fall Notepad

Hi there!

It's Wednesday and that means it's time for some Heartfelt Creations' inspiration!  Today I have 2 projects for you using the Heartfelt Creations Classic Editions Collection released this month.  The first is a card I call "Raspberry Swirl".


I made this using the Ornamental Raspberries Set and Classic Editions Paper Collection.  I love this stamp from the set and all the swirls.  I thought it looked pretty with this Labels 20 die cut.  (Note: you can click on the photo to see this up close.  The complete details are listed at the bottom of the post.)

The second is a decorated junior notepad cover I call "Fall Notepad".


Here's a picture of the inside...


These make beautiful gifts, just add a pen and put in a clear cello bag with schreddies and a topper.  For the Fall Notepad I used the Antique Truck Set, Pumpkin Harvest Set, Classic Editions Set, and the Classic Editions Paper Collection.  The front image on this is one of the 3" x 4" images included on one of the designer papers that I added some stamped and die cut images to.  These 3" x 4" panels are AWESOME to use as a base when creating your cards or tags!  (Note: you can click on the photo to see this up close. The complete details are listed at the bottom of the post.)

For more inspiration, please visit the Heartfelt Creation's Blog here to see what the other designers have created!

Next week, it's time for the August Release!!!  Make sure to check back next Wednesday to see the gorgeous new collection!!!

 Blessings!

Kathy


Raspberry Swirl

Heartfelt Creations Products & Products Carried by HC:
HCPC 3485 – Ornamental Raspberries PreCut Set
HCDP1 224 – Classic Editions Paper Collection

Other Products Used:

Paper: Natural White (Neenah), Early Espresso (SU)
Ink: Onyx Black (VersaFine), Wheat (VersaMagic), Mocha Mama (Powder Puffs)
Accessories:  Soft Suede Marker (SU), button (Michaels), 1/8” ribbon (Michaels), 1/8” Scor-Tape, glue dots, pop dots, Labels 20 (Spellbinders), distressing tool (Tonic), sponge, Bow-Easy, mineral spirits, Prismacolor Pencils: Black Raspberry, Black, Moss Green, Ginger Root, Sandbar Brown

Instructions:
Card base: Cut Early Espresso cardstock 8 1/2” x 5 1/2”, score 4 1/4", fold.  For mat, cut designer paper 4 1/8” x 5 3/8”, distress edges, and ink with Mocha Mama.  Cut striped designer paper section measuring 2 1/8” x 4 1/8”, distress edges, and ink.  Add 2 strips of ribbon as shown with Scor-Tape.  Adhere to card base as shown.

Main image: Stamp raspberry swirl on Natural White cardstock with black ink.  Color with pencils, die cut with Labels 18, sponge edges with Wheat Ink while still in die.  Add to card with pop dots.
Embellishments: Make bow with Bow-Easy and add to card with pop dot.  Remove shank from button, sponge with Wheat Ink, and dot with Soft Suede Marker (optional).  Let dry and add to bow with glue dot.

*******************************************


Fall Notepad

Heartfelt Creations Products & Products Carried by HC:
HCPC 3484 – Pumpkin Harvest PreCut Stamp Set
HCPC 3482 – Antique Truck PreCut Stamp Set
PCPC 3487 – Classic Editions PreCut Stamp Set
HCD 724 – Classic Editions Dies
HCDP1 224 – Classic Editions Paper Collection
Product ID:159223 - Paper Blossoms Molding Mat
Product ID:459222 - Paper Blossoms Tool Kit
Product ID:159723 – Art Institute Glue – Dries Clear

Other Products Used:
Paper:  Solar White (Neenah), Early Espresso (Stampin Up)
Ink: Onyx Black (VersaFine), Mocha Mama (Powder Puffs)
Accessories: Antique Copper and Copper Microbeads (Recollections), Moss  Wrinkled Ribbon (Really Reasonable Ribbon), lace and ribbon (Jo-Ann’s), scissors, double stick tape, button (Michaels), Junior size Notepad 5” x 7”, mineral spirits, Prismacolor Pencils: Black, Mineral Orange, Pumpkin Orange, Terra Cotta, Kelp Green, Moss Green, Ginger Root, Sandbar Brown, Sepia, French Grey 10%, Espresso

Instructions:
Use tutorial from Split Coast Stampers for Junior Notepad using these adjusted measurements:

Base: Cut Espresso 10 1/2” x 8 1/4”, score at 5 1/8” and 5 3/8”
Mats for front and inside: Cut 8” x 4 7/8” using yellow designer paper for front and pumpkin paper for inside, ink edges with Mocha Mama, and glue to base.  For bottom front, cut pumpkin paper 3” x 4 7/8”, ink edges, and glue to base.  For top front, cut designer paper with the 3” x 4” image of wagon and cornstalk, cut Early Espresso 3 3/16” x 4 3/16”, and glue to all together  to base.

Images: Stamp puppy, pumpkin, pumpkin with flower, and apples with Onyx Black on Solar White paper.  Color images with pencils and mineral spirits.  Die cut small pumpkin and fussy cut remaining.  Add all to front of card as shown.  Fussy cut 3 flowers from the pumpkin designer paper, clip slightly between petals, shape with tools and mat, and add to front top left.  Add microbeads to all flower centers.  Add lace and ribbon with double-sided tape, make bow, add button, and add to front as shown.
Pad Topper: Cut 4 7/8” x 2 1/8” and score at 7/8” and 1 1/8” using striped designer paper.   Add to pad top with double-sided tape following the tutorial.  Add pad to inside of base with double-sided tape following the tutorial.  Die cut 3 pumpkins from pumpkin designer paper using the matching dies and glue to the pad topper.

Thursday, June 14, 2012

Time With...ODBD Gift Set

Good morning!

Well, today is a special day for me!  I was asked to do a little project for the Our Daily Bread Designs' Blog.  For my project I made a covered notebook and pen gift set.  Here's a picture...


If you would like all the details, I would LOVE it if you would visit the ODBD Blog and check it out!!!

I'm also submitting this to Word Art Wednesday Challenge #32.

Blessings!

Kathy

Wednesday, January 25, 2012

Pink Daisy Notepad - Elphine House Challenge

Hi there!

It's time for another challenge at Elphine House Australia! This time it's "Anything Goes"! How easy is that!  You can use ANY Elisabeth Bell stamp or image, not just EHA, so you have lots to choose from!

Here is my sample for the challenge...sorry, I can't resist using "Daisy"! She's SO sweet and so much fun to color! 


I was in the mood for pinks and browns on this one! Such a pretty combination! I used the Sending Love Specialty paper from Stampin Up, I love this one particular paper from the collection, and I've been saving it for something special.

I decided to make a junior notepad cover for this one, it makes a beautiful gift! I used the Junior Notepad tutorial on Split Coast Stampers under "Resources-Tutorials-Junior Legal Pad" which you can find here. I adapted it to use the full size legal pad, not the pad cut in half. As usual, I love to take things and change it up a little.  Using this tutorial as a base, you can adapt it to cover all kinds of notepads.  One of these days, I need to my own tutorial!

Here is the inside of the note pad:


I added a favorite Bible verse inside, Proverbs 3:5,6, for encouragement.  This stamp is from the Scripture Collection #2 from Our Daily Bread Designs which you can find here.  I love the Scripture Collections from ODBD, I use them all the time for all kinds of occasions.  The inside is decorated with matching paper from the same designer paper collection and a couple of butterflies with pearls.  I try not to put too many embellishments inside so it closes nicely.

Here is a photo from above it:


Here is a close up photo of Daisy...so sweet!


I am also entering this in two other challenges. The Stampin Sisters in Christ Challenge #123, to make a heart stand out on your card/project which you can find here.  I hope my heart(s) stand out enough! The focus for the challenge is:

Scripture: "Let love and faithfulness never leave you; bind them around your neck, write them on the tablet of your heart." Proverbs 3:3

The other challenge is from Cheery Lynn Designs for Challenge #12, to do dry embossing.  You can find the challenge here.  The butterflies and mats are embossed, and I used my one and only Cheery Lynn die (wish I had more), Fanciful Flourish.  I love the delicateness of this flourish.

For all the ingredients, please see my post here in my Split Coast Stampers Gallery!

Hope to see join in on the EHA Challenge! It's getting to be a lot more popular, Yeah!!! Blessings!

Kathy

Wednesday, August 3, 2011

Tea Party Notepad

Hi everyone!

I'm back again! This time it's not with a card, but with a gift! I decorated a junior notepad as a present for a dear friend of mine. I'll be staying with her this weekend for a few days with my 2 boys. She lives in beautiful Henniker NH which is where I use to live. It'll be a fun visit, especially where they have horses, dogs, chickens, pigeons...my boys will have a blast!

I made lots of the junior notepads that are cut in half and sold them last year at craft shows, but last year I also did one for the full pad just making some adjustments on the measurements. I've been using that pad all this time, but just never got around to making another one. I thought this would make a nice present for her. I'm hoping to make a matching card to go with this before I leave.

Here's the outside of the notepad. I love those yellow pearls on it.


Here's how I decorated the inside, a beautiful verse for her to see.


The inside can't have anything too thick in it, but there's still plenty of ways to decorate it.

I'm submitting this to the Dare to Get Dirty challenges on SCS. This time it's for 4 different challenges!

For stamps: Scripture Collection #1 (Our Daily Bread Designs).
For papers: tea party DSP, certainly celery (SU).
For Ink: black (Versafine).
Accessories: labels eight #4 (Spellb), fiskers rub-ons by Kimberly Poloson, ribbon (SU), adhesive pearls, charm/jump ring/chain, paper flowers, branch w/leaves die (Sizzix), corner rounder, boho blossom punches (SU), frond punch (MS), rick rack.

That's it for now! Thanks for looking!

Blessings!

Kathy